The project refers to 2 room databases. There is a database of all the rooms the department has the ability of filling and there is a database for the rooms that are to be filled in this particular quarter.
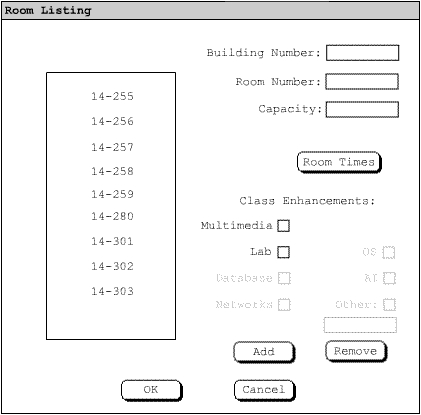
This scenario introduces a user who wishes to add a room to the general room database. If the user would like to enter rooms into the database and set attributes, for example making it a lab or multimedia class room, the user has to select 'Databases->Room...'. The system will then respond by bringing up the Room Database Dialog, as shown in Figure 1. In this scenario it is assumed that the user has already created a schedule and is now going back to add an extra room that has not already been taught in by the Computer Science Department at Cal Poly. Details on creating a schedule for the first time have been explained in Section 2.2. In this scenario the user wishes to enter information for the room 255 in building 14.

Figure 1 Room Database Dialog
The user will start by entering the building number in the 'Building' text field. This field will accept an integer. The 'Room' text field will also accept an integer, or a letter than an integer for rooms in Building 52, corresponding to the room number, you are wishing to add. The 'Capacity' text field will accept and integer for the maximum capacity of the room.
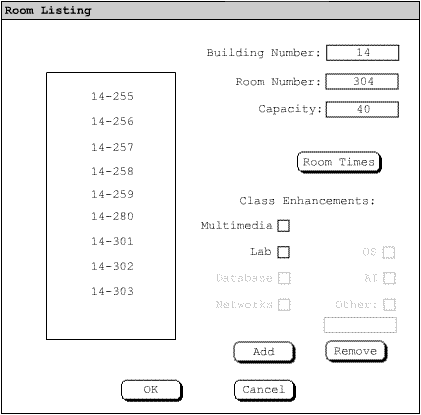
Figure 2 Room Database Dialog Partially Filled
Once the user is finished entering the information about the room shown in figure 2, the user then presses the "Room Time" button to show when the room is availiable. The system responds by bringing up the Room Time dialog shown in figure 3
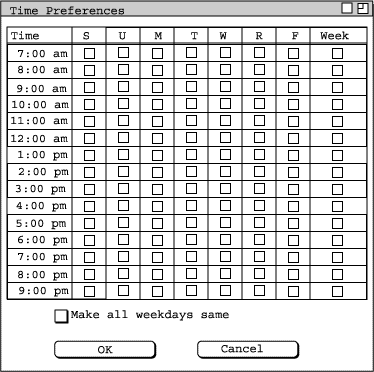
Figure 3 Room Time Dialog
The user checks off the times when the room is availiable to be occupied as shown in Figure 4 then presses ok to confirm the changes, to bring the user back to the Room Database Dialog
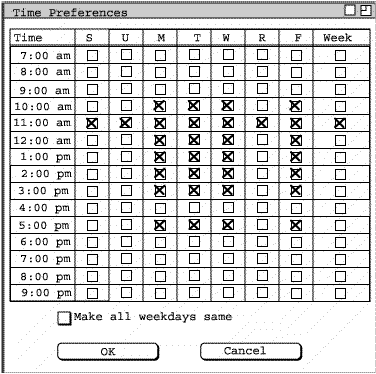
Figure 4 Room Time Dialog Filled
The user then wishes to add the Multimedia and Lab attribute, as well as indicate what other hardware and software is available in room 255. In the Class Enhancements box, there are many check boxes indicating what kind of hardware is in the room. The 'Multimedia' checkbox indicates the ability to show multimedia presentations so the user then checks that check box. The User makes this option availiable by checking the 'Multimedia' checkbox. The 'Lab' check box indicates if the room is capable of containing a lab since the room is capable the user checks the 'Lab' check box. By clicking on this check box, it enables the choices below. The user then checks that the room contains the hardware and software to hold the Networks, AI, and other labs that require Sun OS.
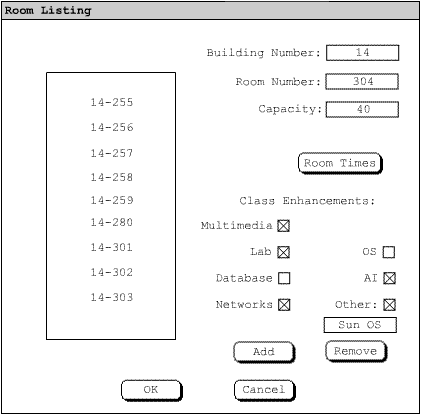
Figure 5 Room Listing Dialog Filled
The User then clicks on the "Add" button to add the room. The system responds by adding the building and room number to the list on the left of the screen in this form (bb-rrr) then by adding the room to the room database. To edit a room the user clicks on the room and makes the changes the user wishes to make then pressing the Change button. The user removes a room by selecting the room they wish to remove from the list then press the "Remove" button. The system will then respond by removing the room from the database and from the list.
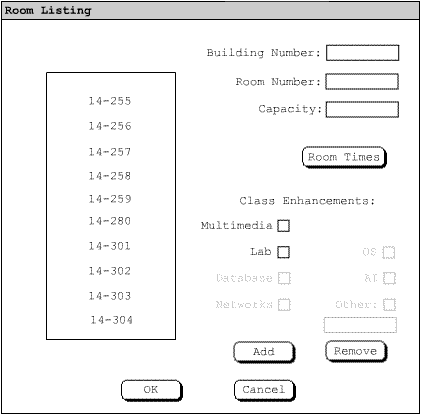
Figure 6 Room Listing Dialog Added
Once the user is finished with the changes, they must then press the "OK" button to return to the previous screen.
To enter a new room for the quarter the user selects 'Project->Rooms... '. The system responds by bringing up the Local Room Listing Dialog as shown in figure 7. This dialog is identical to the Permanent Room Listing Dialog with the exception of the check box to determine if the room is in use for the current quarter. All the same operations apply so refer to the Permanent Room Database for information on adding, changing, and removing rooms.
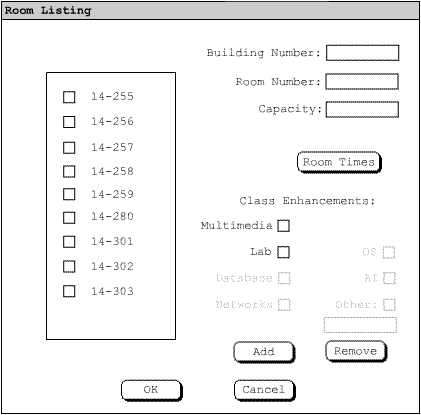
Figure 7 Local Room Listing Dialog