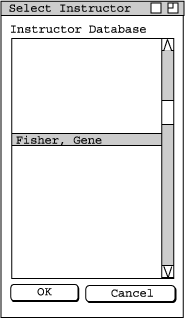
Figure 1
Administrators, instructors, and students can all enter the Instructor menu. Administrators have full access to the menu, while instructors only have access to the first three items: 'Select Instructor', 'Time Preferences', and 'Course Preferences'. These menus will use the logged-in instructor as the default instructor. An administrator is an additional choice, 'General Settings'. With the exception of 'Select Instructor', all of the menus require an instructor to be selected. If one is not selected, a message box appears, informs the user of this, and asks if the user would like to select one now. Students have access only to the 'Select Instructor' menu.

Select the desired instructor from the list box, and click "OK". The instructor's schedule appears in the main view. At this point, one of three things are possible depending on the user:
The instructor's schedule is viewed in two parts in the main window. The upper part looks very similar to the main schedule, with all of the instructor's classes in order of course and section number. The lower part of the view shows a grid of the instructors weekly schedule.
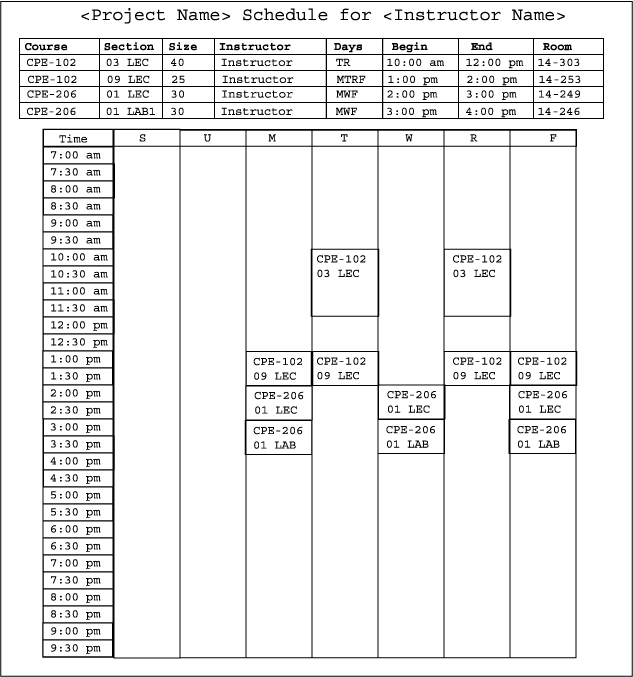
To go back to the main schedule, choose 'Schedule->View Schedule'.
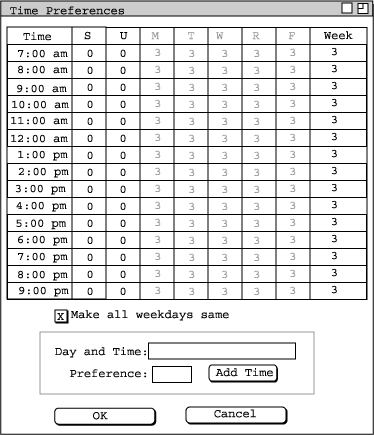
What is shown above is the default settings for an instructor who has not changed their settings yet. Currently, the checkbox marked "Make all days same" is checked. This checkbox will allow the user to quickly change the settings for the entire week by entering in only the time preffered. For example, the user enters "10:00 am" to inidcate MTWRF at 10 am, and "SU 2:00pm" to indicate Saturday and Sunday at 2 in the afternoon. In the figure below, the user enters a time in for the entire week.
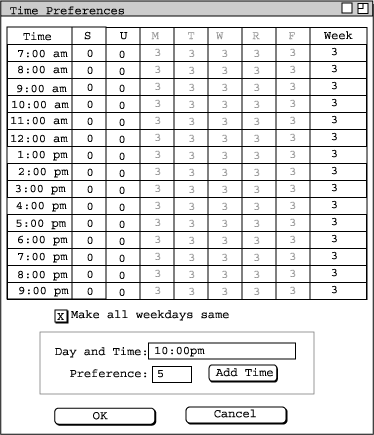
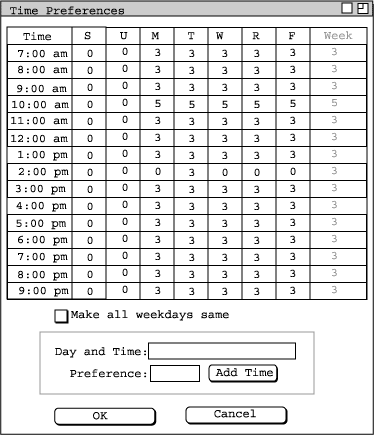
The user clicks "Add Time" and the information is entered into the table. The user now would like to enter in a time for different days. The user unchecks the "All days same" checkbox and enters in the days and time they would like changed, along with the new preference for this time. This is shown in the figure below:
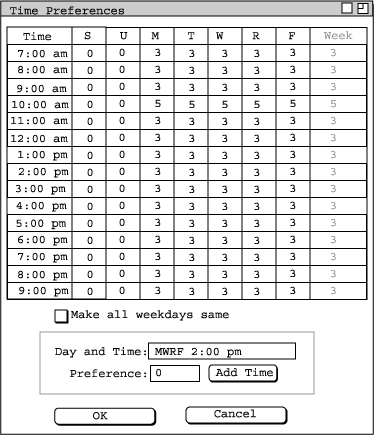
When the user clicks "Add Time", the time is entered into the correct fields above. This same effect is achieved if the user directly edits the data in the table.
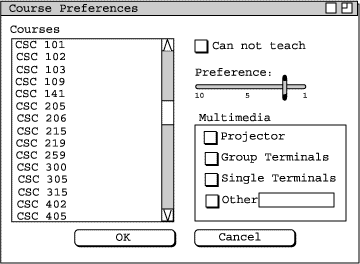
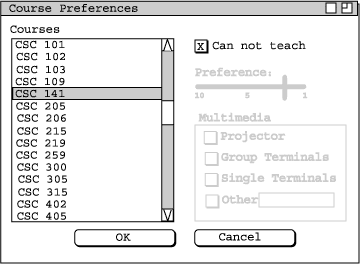
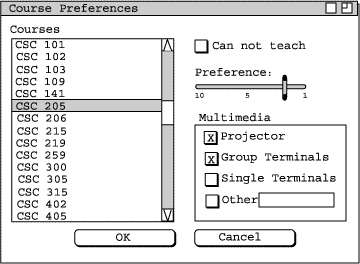
Select the course you would like to change, and the current preferences for that course will appear on the right. The instructor can not teach a class, so the "Can not teach" checkbox is checked.
The user can teach other classes, so for those, the slide bar is used to indicate the preference of teaching that course. In the Multimedia box, the user selects what items are needed to teach this particular class.
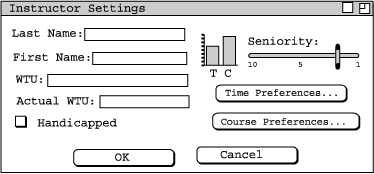
The first and last name of the instructor are shown in the text fields marked "First Name" and "Last Name". The instructor's Work Time Units, or WTU, is a number shown in the field labeled "WTU". Work time units that are already alloted are shown under the heading "Alloted WTU". The instructor is also given a seniority rating to allow some instructors to be given more weight when scheduling, with 10 being the highest seniority and 1 being the lowest. A bar graph shows the "generosity" levels of instructors with time generosity on the left and course generosity on the right. The equation for the time graph works like this:
((Num of Acceptable Hours) / (2 * WTU) - 1) * 100
For example, Professor X has 60 hours he is willing to work, and 15 WTU, so his "time generosity" is 100%. Professor Y has 15 hours he is willing to work, and 15 WTU, so his "time generosity" is 0%. The equation for the course generosity is:
(Sum of all course preferences) / (Number of courses * 10) * 100
Courses which a professor can't teach are regarded as having a preference of 0. If there are five courses available, and Professor X's preferences are 5, 9, Can't teach, 1, and 4, his generosity level is:
(5+9+0+1+4) / (5 * 10) * 100
(19 / 50) * 100
.38 * 100
38
Professor X has a course generosity of 38%
If the administrator decides that he/she would like to change the instructor's preferences after viewing the bar graphs, he/she may do so by clicking the button marked 'Time Preferences' to change the time preferences (see Time Preferences) or by clicking 'Course Preferences' to change the course preferences (see Course Preferences). To save any changes made, click "OK".