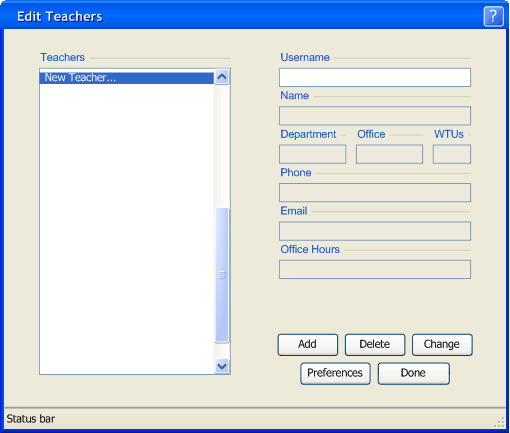
The first time the Scheduling Administrator chooses the Teacher Database management operation, the software displays the following window:
Figure 2.5.3.1: Initial View of Teacher Database Management Interface
The scrolling list box on the left shows all the Teacher Records currently in the Teacher Database used by the Scheduler Tool in alphabetic 'Last, First' name order. On the right are the eight data fields corresponding to each Teacher Record:
In this scenario, the Scheduling Administrator creates a record for a teacher with username gfisher. For purposes of illustrating list sorting only, the figures below show three teachers in the Teacher Database already: Tim Kearns, Mel Phillips, and Clark Turner. These entries have no bearing on the actions taken by the Scheduling Administrator or subsequent results.To add a teacher to the Teacher Database, The Scheduling Administrator first double-clicks on the New Teacher... entry in the Teacher Database. The software then clears all the values in the fields on the right, and the cursor is placed into the text box labeled "Username", where editing of each field then begins.
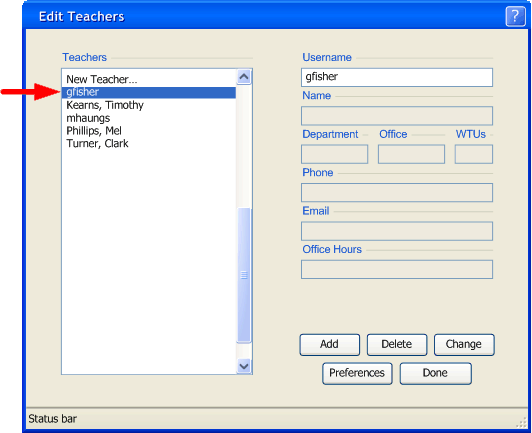
Figure 2.5.3.2: Adding to Teacher Directory
To change a teacher's username, the Scheduling Administrator double-clicks on the desired entry in the scrolling list-box. The software then fills the data fields on the right with the known data corresponding to those fields. From here, editing is the same as adding a teacher to the Teacher Database, with the exception that the Scheduling Administrator then clicks the 'Change' button when sufficient data is entered. Upon successful completion, the software then highlights the teacher in list on the left.
If, for reasons set out by the university, the Scheduling Administrator needs to change the teacher's directory information or preferences, he/she clicks on the 'Preferences' button; the software then displays the Teacher Preference Editing Dialog explained in Section 2.6.4, and once editing is complete there, returns the Scheduling Administrator to the Teacher Database Editing Window.
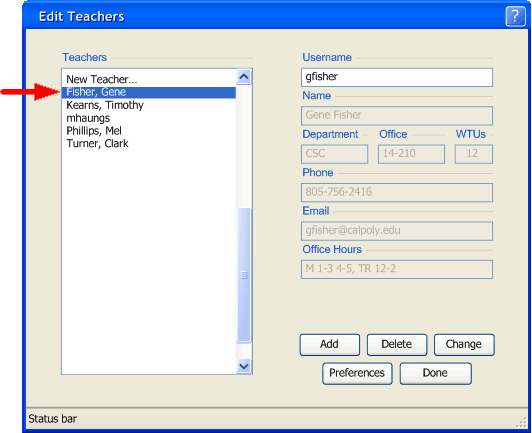
Figure 2.5.3.3: Edited Teacher Directory Info
To delete a teacher from the Teacher Database, the Scheduling Administrator double-clicks on a teacher entry in the list on the left as if to edit it, but instead then clicks the 'Delete' button. The software takes the Scheduling Administrator to the Delete Confirmation dialog:
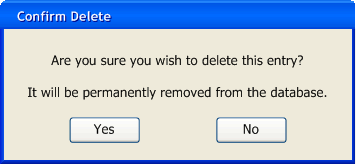
Figure 2.5.3.4: Delete Teacher dialog
To close the Teacher Database Management window, the Scheduling Administrator clicks on the 'Done' button; this returns the Scheduling Administrator to his/her previous view.