2.3 Basic Schedule Generation - Making a New Schedule
This scenario shows an administrator making a new schedule and assumes that the administrator has already populated the database and taken care of initial setup. Refer to section 2.2 for further details. Making a new schedule is a common task used to begin planning for the upcoming school terms. In this scenario, it is assumed that the program has passed its initial start up and is ready to use. Details of the first iteration of the program are in the preceding section, 2.2. To learn about more specific scheduling options see the Advanced Scheduling section. It should be noted to the reader that there is a difference between the database that is edited by an administrator and by teachers. Whenever a teacher edits his preferences, it gets stored and saved in the permanent database, or the database that is on the server. Whenever the administrator makes an adjustment to the database, the change is only present for the current schedule and term. The administrators adjustments to the databases superceede any change a teacher can make to his preferences, but they only last for that term.When a new schedule is created, copies of the databases are added to the file so that any editing of preferences that the administrator makes are not permanent, but only concern the specific schedule that is being edited.
To make a new schedule, the administrator selects the Make New Schedule item in the File menu. See Figure 2.1 - 1. Then a window like the one seen in Figure 2.3.2 opens to let the user adjust any specific properties about this specific schedule.

Figure 2.3 - 1
The drop down menu is used to select which term the schedule will apply to. The text field below is used to input which year this schedule is going to be used for. The upload button is used to upload courses from the course database. When the user arrives at that point a number of sections must be given to each course in the database for the specific term. The options at the bottom are used to decide if the user wants to either use a previous schedule, still saved somewhere, or use the schedule from last term, or create a completely new scheduel.
The user selects fall from the drop down menu. The user then decides that this term is the fall term of 2005 and so he writes it in the text field next to year.
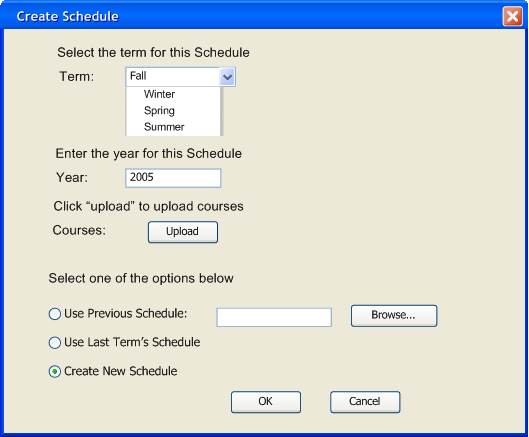
Figure 2.3 - 2
The user then clicks the Upload button next to course and the courses are uploaded. The Scheduler then takes the user to a screen where the user will have to select how many sections of each course will be necessary for this term.
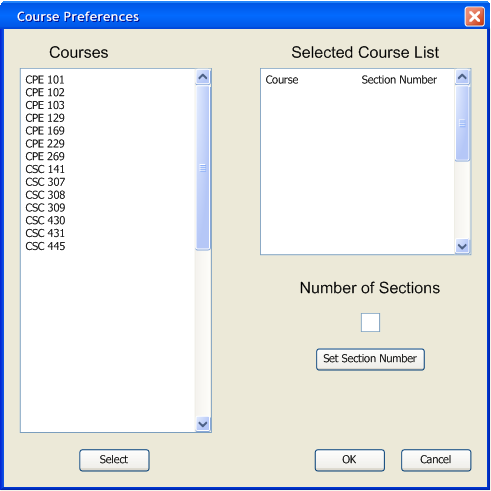
Figure 2.3 - 3
The user first decides which courses he wants to edit, then double clicks on each of them or selects them all and clicks the select button to bring them over to the Selected Course List. The user selects CSC 141, CSC 307, CSC 308, CSC 309, CSC 430, CSC 431, CSC 445, and then clicks select to bring the selected courses over to the Selected Course list.
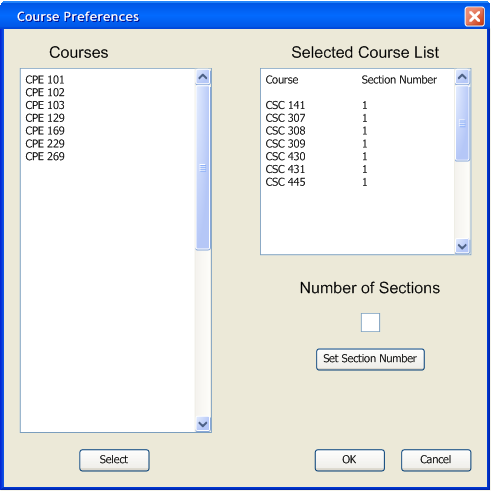
Figure 2.3 - 4
All courses have a default section number of one. The user then uses the 'Number of Sections' text field to input that 4 sections for all of these courses.

Figure 2.3 - 5
The user then clicks 'Set Section Number' and the courses are then added back to the Course List. The user then selects just CPE 101 by double clicking it.
Figure 2.3 - 6 After clicking 'Set Section Number'

Figure 2.3 - 7 After selecting CPE 101
The user then clicks into the 'Number of Sections' text field and writes that this course needs 15 sections for this quarter. The user then clicks 'Set Section Number'.
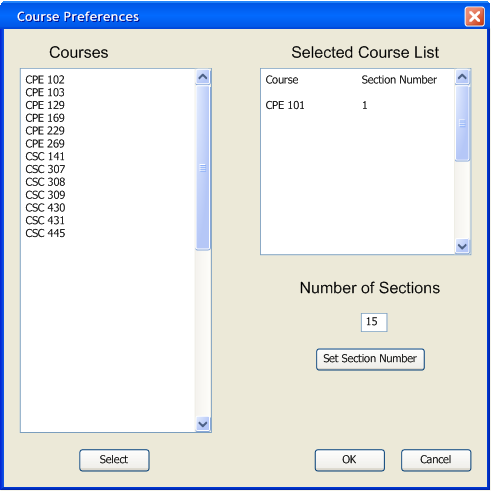
Figure 2.3 - 8
The user continues to do this until all of the courses that are needed this quarter have been adjusted. If any course is left without giving it a number of sections the Scheduler will give that course a section number of one. The user clicks OK to exit the dialog. This brings the user back to the initial Schedule set up screen. (See Figure 2.3 - 2 to know what it looks like right now.) The user then hits OK and the dialog closes.
The administrator then clicks OK to exit the dialog.
2.3.2 Creating a New Schedule from a Previous Quarter
For the purposes of this scenario, the user only needs to select the radio button at the bottom labeled “Use Previous Schedule”. The figure below shows the dialog after this button is selected, which enables the “Browse” button.
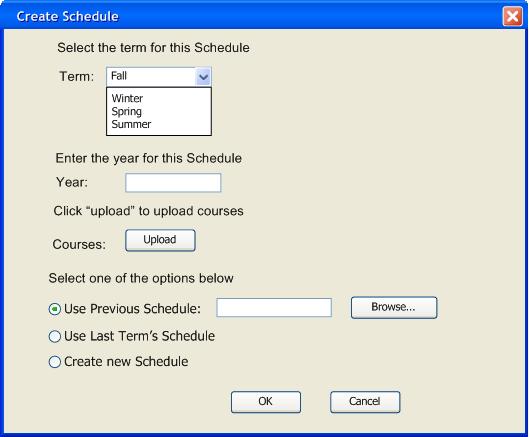
Figure 2.3 - 9
The user enters the location of the previous schedule file, or browses for it by clicking the “Browse” button next to the text area. By clicking Browse, the following file selection dialog comes up as displayed in figure 2.3 -10.
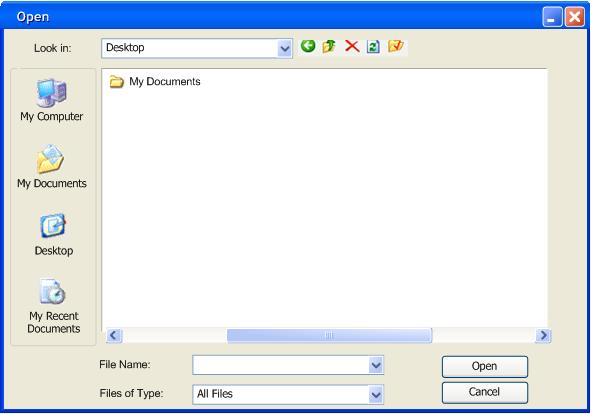
Figure 2.3 - 10
Because of the secure environment, the user chooses from the server primarily, and additionally from local directories as shown in the following figure. File types compatible with the Scheduler are .sch. After the file is found, the pathname will be filled into the text area and the user presses “OK” when ready to continue.
2.3.3 Creating a New Schedule Using Last Term's Schedule
The user may check the box at the bottom labeled “Use Last Term’s Schedule”. This will cause the Scheduler to automatically use the schedule that was used from the previous term. If there was no schedule in the previous term, this option will be grayed out. The figure below shows the “Use Last Term’s Schedule” option selected. The user then presses “OK” to continue.
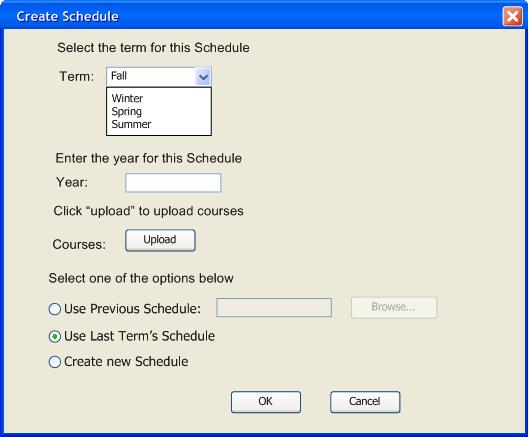
Figure 2.3 - 11
The most common way to create the schedule is to simply use the 'Generate Schedule' menu item. When the 'Generate Schedule' menu item is pressed, the system takes (at this point in the project) an undisclosed amount of time to generate the schedule. The system uses all of the information that has been gathered, teacher preferences, required number of course sections, available rooms, etc. to develop the schedule. The Scheduler schedules the term with fairness in mind. This means that the Scheduler will mathmatically try to keep every instructors schedule equally satisfying. At the end of the schedule generation, a list will appear that shows whos points got damaged the most. With this information, the administrator can decide whether or not to force some preference points upon the teachers he wants to to force them into specific time slots and courses. Of course by doing this other teachers preferences may be damaged. For more specifics see section 2.6
The generated schedule will appear like the schedule below
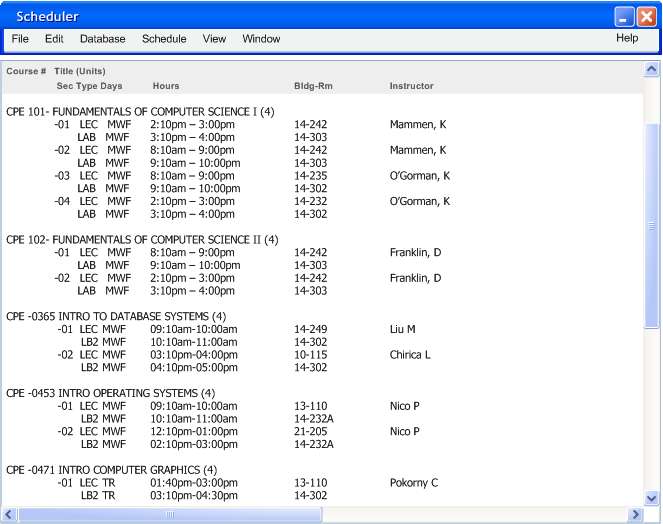
Figure 2.3 - 12
Once the schedule is done being generated, the Scheduler displays a list of Instructor Results showing how many points they were able to be scheduled with.
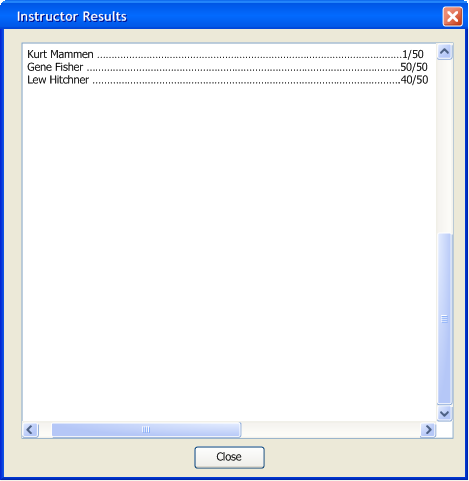
Figure 2.3 - 13
The administrator can then go to specific instructors preferences and adjust them so that the schedule is more equal. More specifics regarding this process can be viewed in section 2.6
Prev: Initial Setup | Next: Instructor Preferences| Up: Functional | Top: index