When the user clicks the Schedule button, the main Schedule view appears in the workspace. The main schedule view is a list (Fig. 2.6.1), with a row for each section below each class, consisting of the professor, the time of the class, and the room it is scheduled in. In this view, there is also a check box next to each class, which allows the scheduling administrator to lock that class for future schedule revisions. If the "Generate" button is pressed again, the locked classes will not be changed.
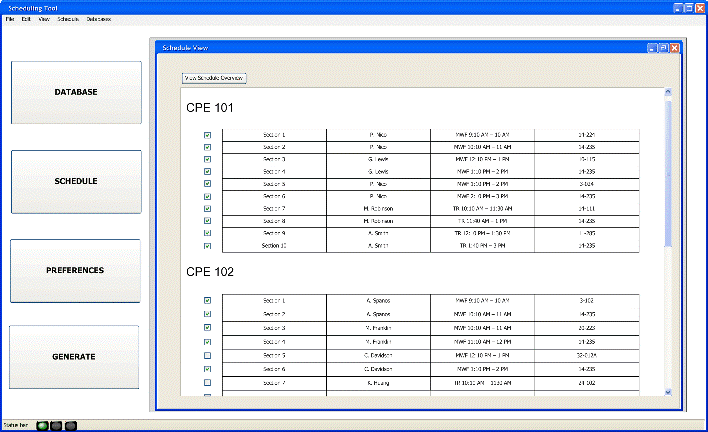
Figure 2.6.4 The main schedule view
There is also a schedule overview. To get to the schedule overview, the user presses the "View Overview" button on the main view. The overview is a grid showing each day, broken up into hourly time slots (Fig. 2.6.2). Each cell shows the number of classes in that time slot, and the number of available rooms. There is also a button to view a weekly calendar breakdown of the schedule by class, professor or room. By default, the breakdown views will show all timeslots, but the user can select specific times to view by highlighting those times on the main grid.
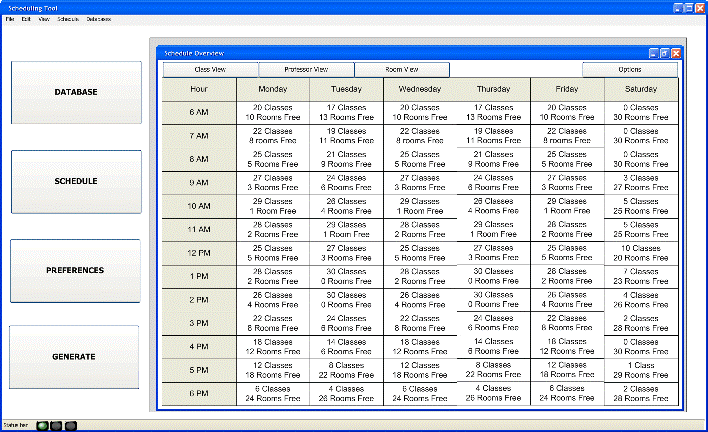
Figure 2.6.2 The schedule overview
When the user clicks the Options button, a window pops up asking with different customization options for each view. The schedule can be viewed by class, room or professor. Each of these can be further broken down. There is a Select button next to each option which allows the user to specify what parts of the schedule they would like to view. The Class option is broken down into Department and Class. The user can select the checkbox next to a department to view the entire department, or click on a department to select specific classes. All departments and classes are selected by default. The same can be done with Department and Professor for the Professor view, and Building and Room for the room view. (Fig. 2.6.2).
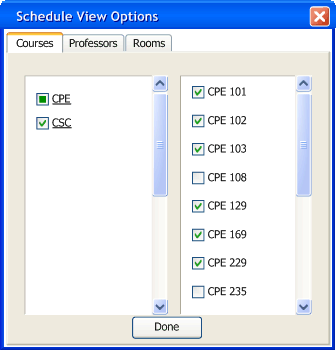
Figure 2.6.3 Schedule view options
Each specialized veiw has 2 options. There is a weekly view (Fig. 2.6.4, 2.6.5), and a calendar view (similar to the overview, see Fig. 2.6.6) By default, the weekly view is shown, and the calendar view can be accessed by selecting the "Calendar" tab in the viewing area.
The class view (Fig. 2.6.3) lists the complete schedule, seperated by class, for every class the user selected in the Schedule Breakdown options. Each class has a table, broken up by day, which shows the sections of that class scheduled that day, the times they are scheduled, their locations, and the professors scheduled to teach them.
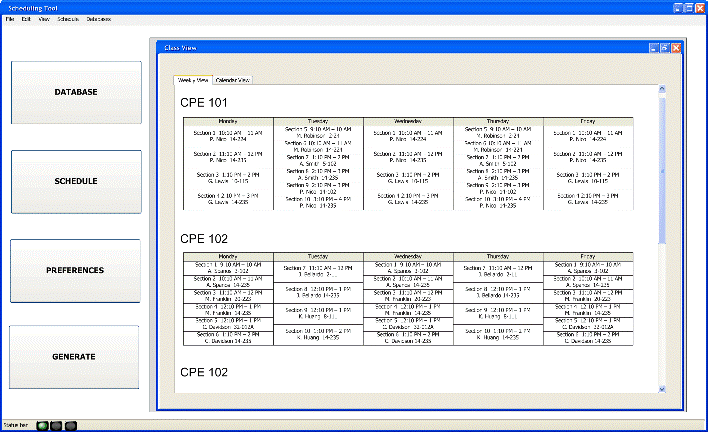
Figure 2.6.3 The weekly class view
The professor view (Fig. 2.6.5) is very similar to the class view, except the schedules are broken up by professor instead of class. The schedules are displayed in a table, broken up by day, showing the classes the professor is teaching that day, their times, and their locations.
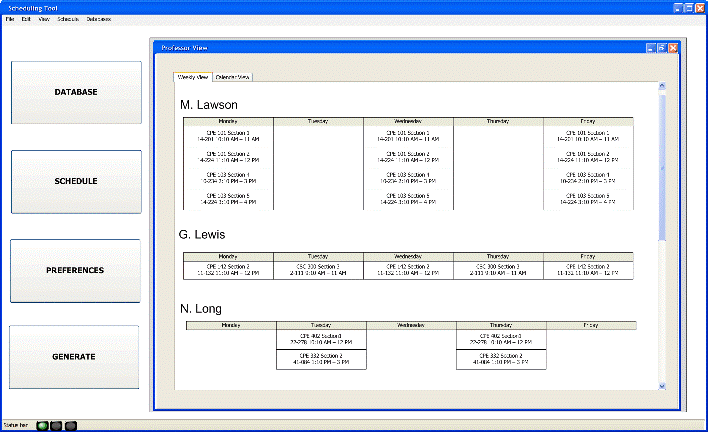
Figure 2.6.5 The professor weekly view
The room view shows the schedule, broken up by room. Each room is listed, with a calendar displaying the classes in that room on that day, showing the class, professor, and time. As with all the views, there is a calendar option (Fig 2.6.6) which shows each day, broken up by hour, and what classes are in that room at that time. If there are no classes the cell is left blank.
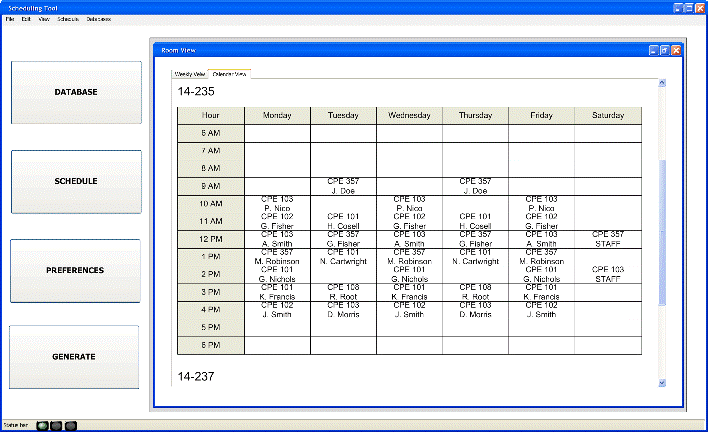
Figure 2.6.6 The room calendar view