2.5.2 Editing an Existing Classroom
To edit an existing classroom, the user highlights a classroom in the Classrooms window, and presses 'Edit', as shown in Figure 2.5.2-1.
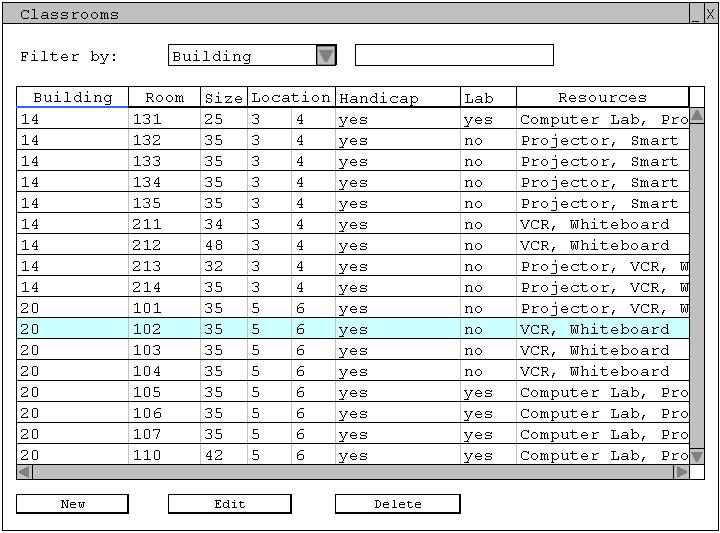
Figure 2.5.2-1: The Classrooms window appears with a room highlighted ready to edit.
A new window appears displaying the selected classroom information, as shown in Figure 2.5.2-2.
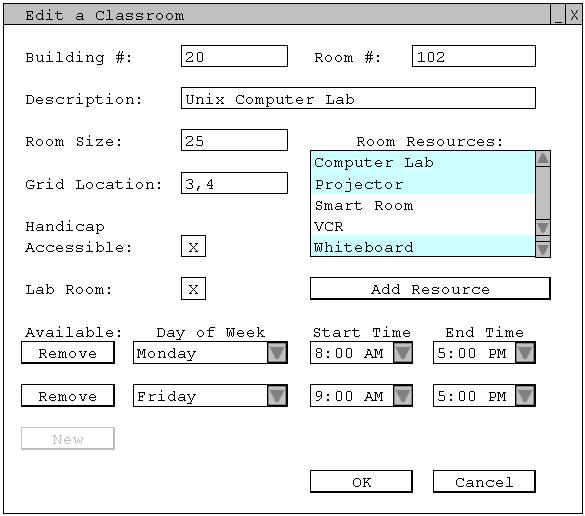
Figure 2.5.2-2: The Edit window appears with data already inserted in the fields.
Similar to the way the user adds a new classroom, the user is able to edit classroom information. To quickly delete a classroom's availability the user can press the 'Remove' button to the left of the time slots. When a user wants to make a classroom unavailable for the whole quarter, he or she removes all the time slots and keeps the room in the database for future quarters.
The user has completed editing the classroom information, and presses the 'OK' button at the bottom of the window in
Figure 2.5.2-2. The database is then updated and the room is available for future
schedule generation. If the user is unhappy with
the entry of a room the user has the option to cancel the entry by pressing the
'Cancel' button at the bottom of the window in Figure 2.5.2-2.
Prev:
adding a new classroom | Next:
finding a classroom
| Up:
viewing and editing classroom information | Top: index