When the user initially starts up the Test Tool program they are brough to the main screen for either a teacher, proctor, or student.
If a teacher is connecting to the department server, or a student is taking an in-class exam, a login screen pops up like in Figure 2.1.1. The user enters their username and password and chooses to login as a Teacher, Student, or Proctor.

Figure 2.1.1: Login screen. Empty (left) and filled out (right).

Figure 2.1.2: File menu.
From the File menu there are several options for opening, closing, saving, and printing tests. There are also options for importing and exporting databases.

Figure 2.1.3: Edit menu.
The Edit menu has basic operations for editing text such as undo, redo, cut, copy, paste, delete, select all and find. The "Find" operation opens a new window where the user types in a word they want found in their text and then clicks "Find". Test Tool then goes to the first instance of the word in the text.

Figure 2.1.4: Find dialog empty (left) and filled out (right).
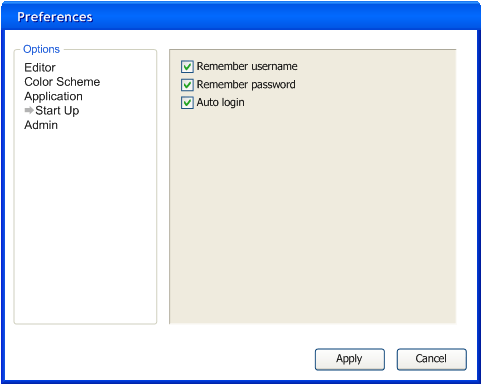
The preference operation opens a window where the user sets settings that they prefer. These settings include settings for the text editor, color scheme of the application as well as start up and admin options.

Figure 2.1.5: Preferences window.
The Help menu has two options: Help and About. "About" opens a window telling the user information about the application, such as the version number. The "Help" option opens a window with a list of common questions and answers about the basic operations of the Test Tool.

Figure 2.1.6: Help menu.