After a teacher clicks the Manually Create Class button in the New Class dialog, the Create New Class window below opens.
![]()
Figure 2.2.2.1: Create New Class dialog.
The Class Name text field is a one-line string that appropriately describes the class. This name is used throughout the program to refer to the class. The Year is a positive number that is the year in which the class is taking place. The Period is a drop down menu which indicates what grading period of the academic year the class is taking place in (Fall, Winter, Spring, or Summer).
Below that is the table labeled Students. Each row in the table represents a student. The entries in the Name column are the students' full names, and the entries in the ID column are the students' login IDs. Both are one-line strings.
The Add button opens the New Student dialog. When a student is selected in the table and the Edit button is clicked, the Modify Student dialog appears. When a student is selected in the table and the Delete button is activated, the Delete Student dialog appears.
The teacher, seeing the Create New Class dialog, enters information by a combination of typing and selecting from pre-defined choices. The teacher also adds several students using the Add button and New Student dialog. The updated window is shown in Figure 2.2.2.2.
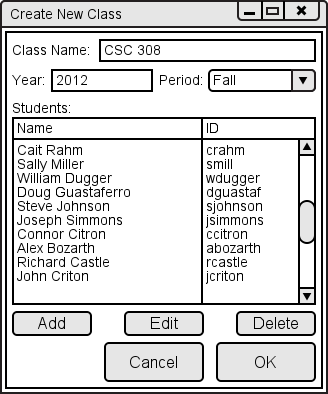
Figure 2.2.2.2: Filled out Create New Class dialog.
The teacher then clicks the OK button to finish creating the class. Upon clicking OK, the Create New Class window closes and takes the teacher to the class spreadsheet as seen in Figure 2.2.1.7 in the previous section.