2.3.1. Designing Pages for Tutorials
This scenario demonstrates how a user designs a Page for a Tutorial. The interface is similar to a scaled-down word processor/html
document editor, with a few additional features to accommodate the
specific functions the CSTutor application requires.
2.3.1.1. Notes about HTML
HTML is used as a source for Pages and Quizzes. As such, all of the HTML tags used in Pages and Quizzes are rendered the same as they would be in any standard web browser. There are, however, a couple XHTML tags made specifically for Pages. Page-specific XHTML tags as follows:
There are two page-specific XHTML tags, <code> and <ilink>. These correspond to adding an executable code segment or an internal link, respectively.
The <code> tag has one parameter, called input. It is required if there is to be any code at all in the code segment. An HTML example of the <code> tag is shown below. Note that \n and \t characters are used for line breaks and tabs, respectively.
-
<code input = "public static void main(String args[]) {\n\tSystem.out.println(\"Hello World\");\n}">
</code>
The <ilink> tag has one parameter, called href. It works the same as a typical hyperlink (i.e. <a href = "www.google.com">click me!</a>), but has no closing tag. An HTML example of the <ilink> is shown below.
-
<ilink href = "UNIQUE_PAGE_ID">
The UNIQUE_PAGE_ID parameter is the Page ID of the Page the link points to. When rendered, this tag looks like a standard hyperlink, and appears as the title of the corresponding Page.
2.3.1.2. Basic Interface
Below is what the user sees upon entering the Page Builder interface.

Figure 2.3.1a:
Interface layout of empty page
Upon opening the Page Builder, the
user sees several basic and familiar word processing menus,
toolbars, and toolbar buttons. From here, the user can:
- Begin typing / insert text
- Insert an image
- Insert an internal link to
another page
- Insert an external HTML link
- Insert executable code segments
- Import HTML
2.3.1.3. Inserting Text
To insert normal text, simply begin typing. To insert already
existing text, copy the existing text to the clipboard using standard
text copying processes (Control + C or Edit→Copy) and then paste
it into the current page (Control + V or Edit→Paste). The user
can format the text the same way as any simple word processor,
through use of the ruler tabs, paragraph alignment, line spacing,
bullets, font colors, and font types.
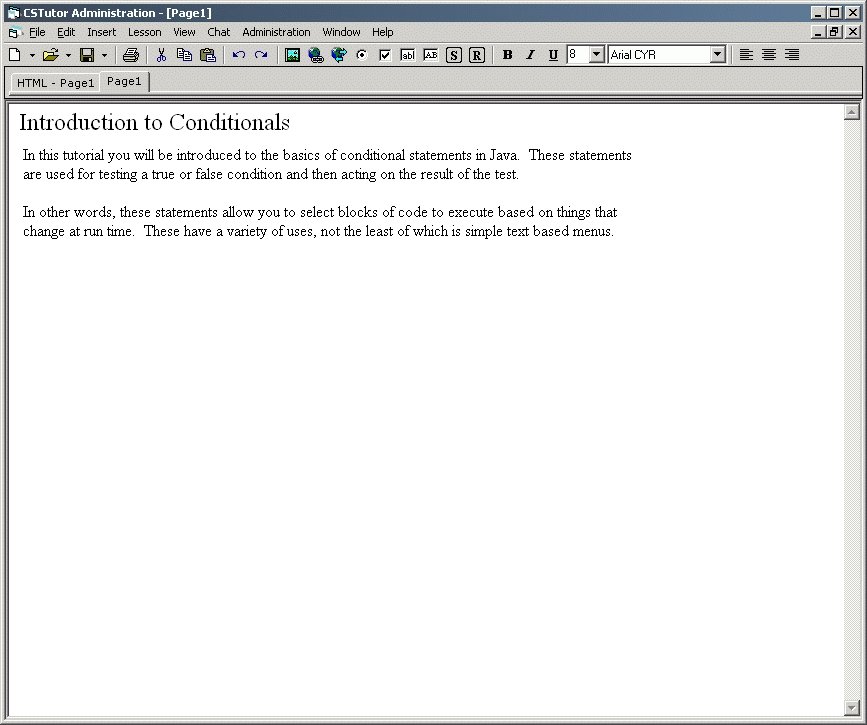
Figure 2.3.1b: Sample page after the user enters some text
2.3.1.4. Inserting an Image
To insert an image, use the Insert menu or click the Insert Image button
on the toolbar. A dialog window launches, asking the user to
specify the path of the image stored on the hard drive.
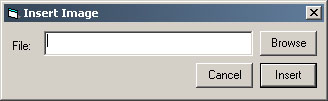
Figure 2.3.1c: Interface layout of image insertion dialog box
The user can
manually type the path to the image, or can push the “Browse”
button and find the image in typical file-browser/explorer fashion.
The CSTutor supports standard HTML image file types (.jpeg, .gif,
etc.). When the user locates the appropriate image, “Insert”
inserts the image into the page, and “Cancel” terminates
the operation.
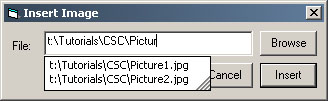
Figure 2.3.1d: Interface layout of image insertion dialog box filled out
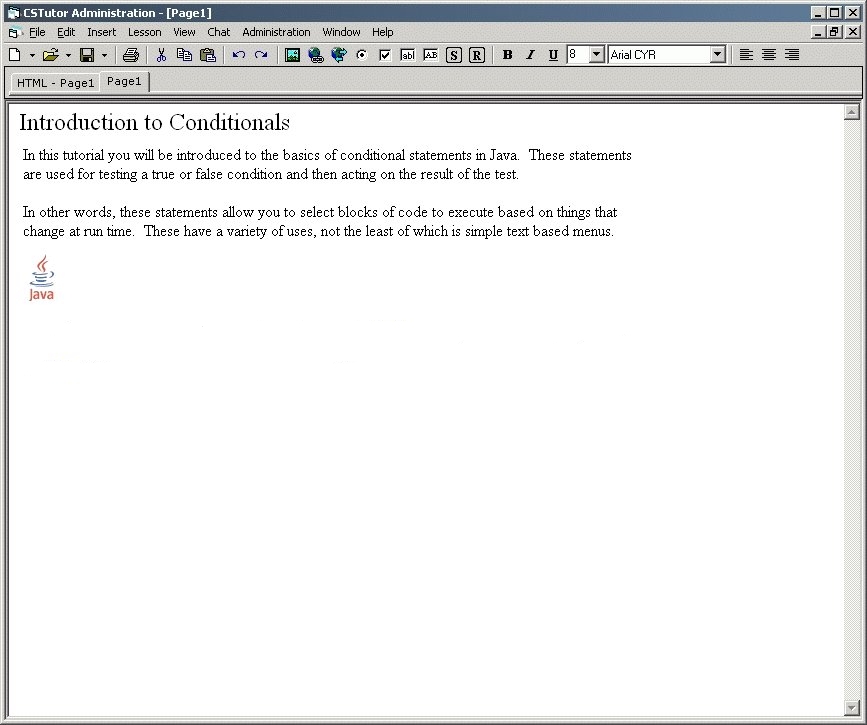
Figure 2.3.1e: Sample page with added image
2.3.1.5. Inserting an Internal Link
To insert an internal link to another page, use the
Insert menu or click the Internal Link button on the toolbar. This
launches the Page Database Explorer. The user browses through the
pages and double clicks the appropriate page or clicks the "Link to Selected" button. The internal link
appears in the editor as the title of the linked page. "Cancel" cancels the operation.
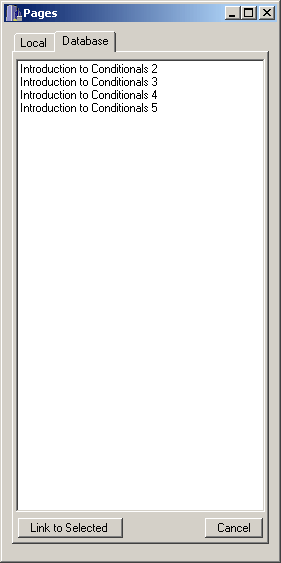
Figure 2.3.1f: Interface layout of page
database browser
2.3.1.6. Inserting an External Link
To insert an HTML link to the internet, the user either types the URL directly into the
document (the link highlights itself and becomes clickable), or clicks
the URL generator button in the toolbar. A dialog pops up,
prompting the user for a link and the text they would like the link
to appear as.
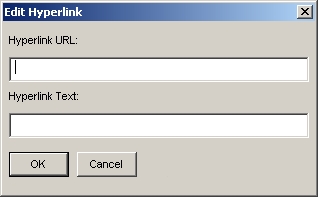
Figure 2.3.1g: Link generator dialog box
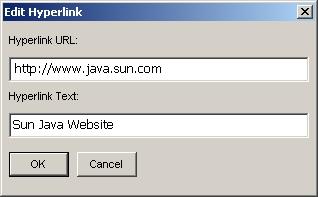
Figure 2.3.1h: Link generator dialog box, filled out
After the user inputs the appropriate information, "OK" inserts the link into the document and "Cancel" terminates the process.
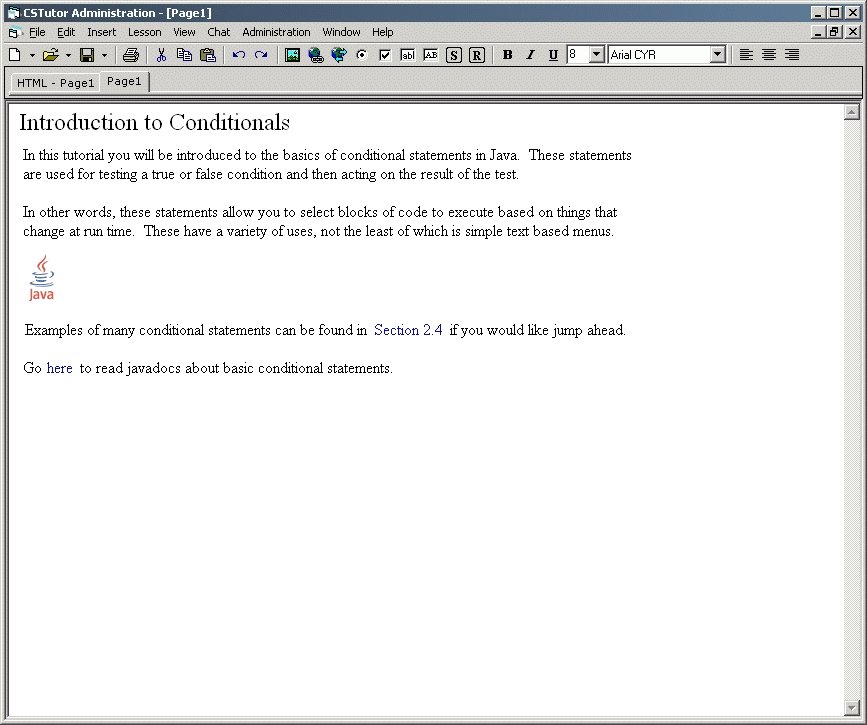
Figure 2.3.1i: Sample page with added internal and external links
2.3.1.7. Inserting a Code Segment
Inserting a code segment is much like inserting an image. It automatically adds a frame in which the user can add,
compile, and then run code. These code segments, by default, support the Java Bean Shell. Currently, the CSTutor does not support other languages.
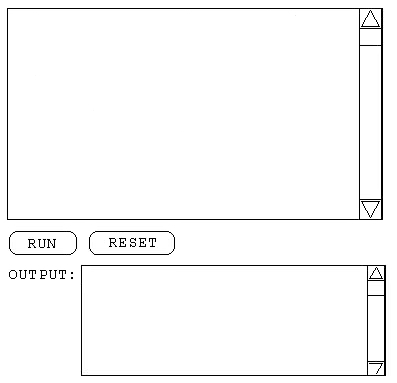
Figure 2.3.1j: Empty code segment, upon initial insertion into page
The user resizes/aligns the code segment as
desired, and then enters appropriate code in the first textbox. The code segment automatically has a “Run” and “Reset” button.
The user can perform a pseudo "Save" operation on the code he or she edits by pushing the "Run" button. If the code is incomplete or contains errors, then the Output box displays an error message (or generate undesired output, if the code is valid). At this point, pushing the "Reset" button reloads the code from the last point it was run. In this way, the instructor sets the code box to contain the code he or she wishes to display to the student user.
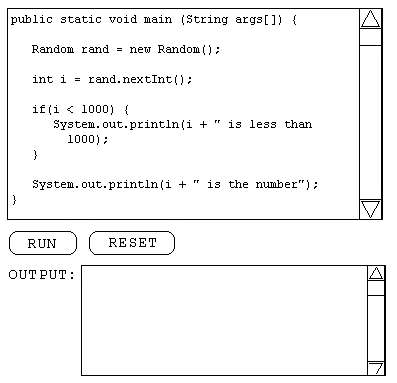
Figure 2.3.1k: Filled out code segment
Users (those
viewing the tutor) push “Run” after editing the
teacher-written code to their liking. After pushing “Run,”
the segment compiles and runs (if there are errors, it says so in the Output) and displays the result. The “Reset” button
reverts the code in the segment back to the way it was before any
editing took place by the student, if the student feels he or she needs a clean slate from which to work.
2.3.1.8. Editing HTML
To import or edit HTML, the user may switch to the HTML view of the page by clicking on the HTML tab in the upper left corner of the editing area. From this view, the user can edit and import the HTML of the current page however he or she wants, should the user feel the need to do so.
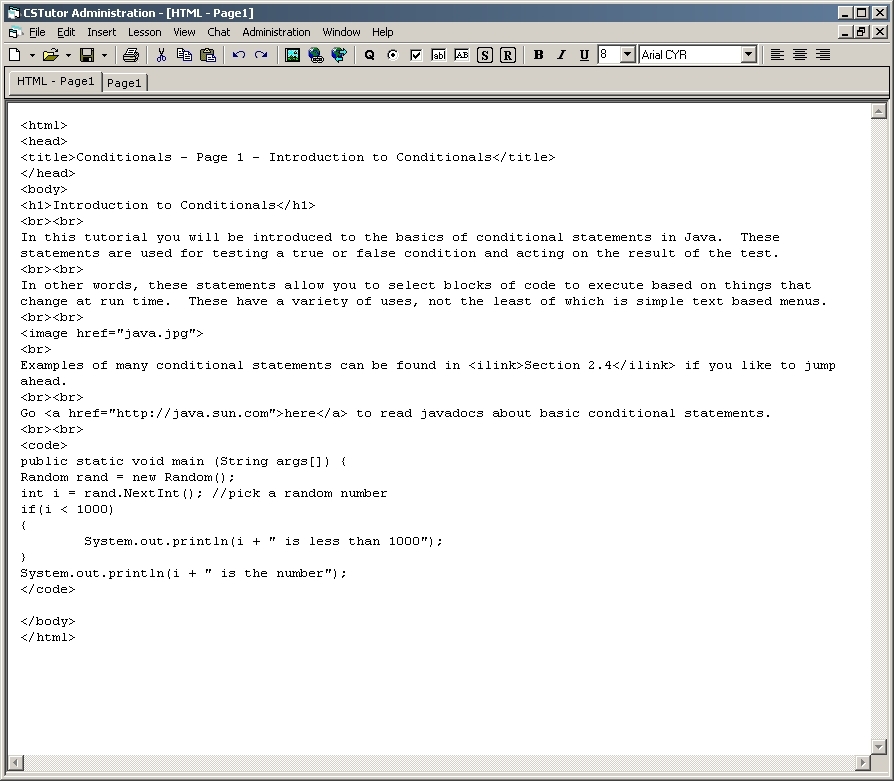
Figure 2.3.1l: HTML view of a Page
2.3.1.9. Completing a Page
When the user completes a Page, the user invokes the File→Save As command from the menu to save the Page to the databse. The user inputs an appropriate title for the Page (in this case, "Introduction to Conditionals"). The default location of the Page file is described in Section 2.7 Administrative Details.
The page can now be called
from the database by the Tutorial Builder, and built into a Tutorial as
part of a sequence of pages. See Section 2.2. and Section 2.3.3. for more details about
creating a Tutorial.
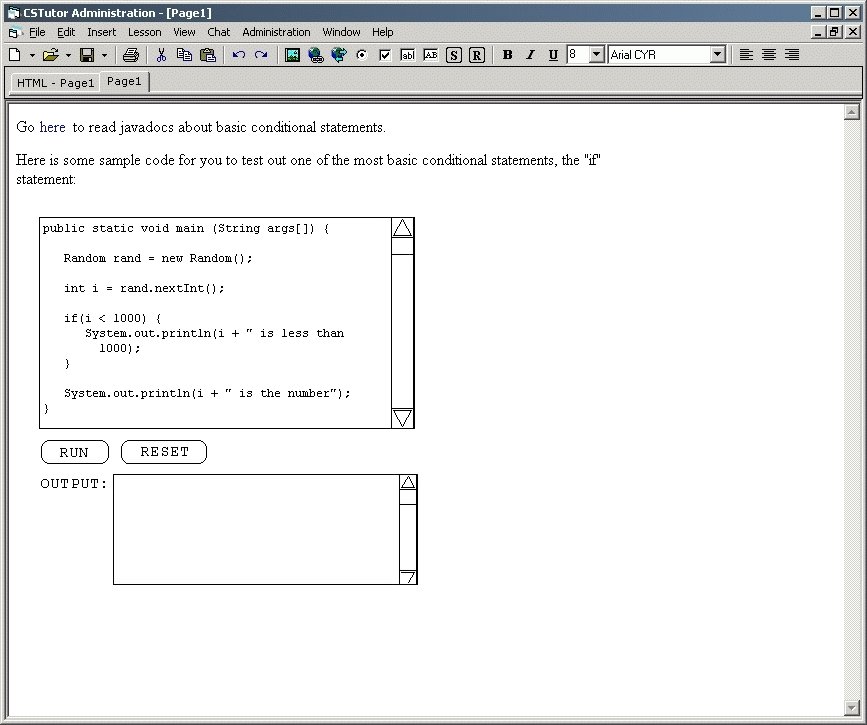
Figure 2.3.1m: Interface with sample content
2.3.1.10. Possible Errors
When creating a page, the user may encounter errors generated by invalid operations or actions. These errors are found in Section 2.8.4.
Prev: tutorial authoring
| Next: designing a quiz
| Up: functional requirements
| Top: index