2.8.2. Starting and Joining In-Class Lectures
From the designated machine in the classroom the instructor launches eClassroom, the window
is shown in Figure 2.1-1.
The user selects File from the command menu, the drop
down menu is shown in
Figure 2.1-3 .
The user selects the open command and a new window appears, this window is shown below in Figure 2.8.2-1.
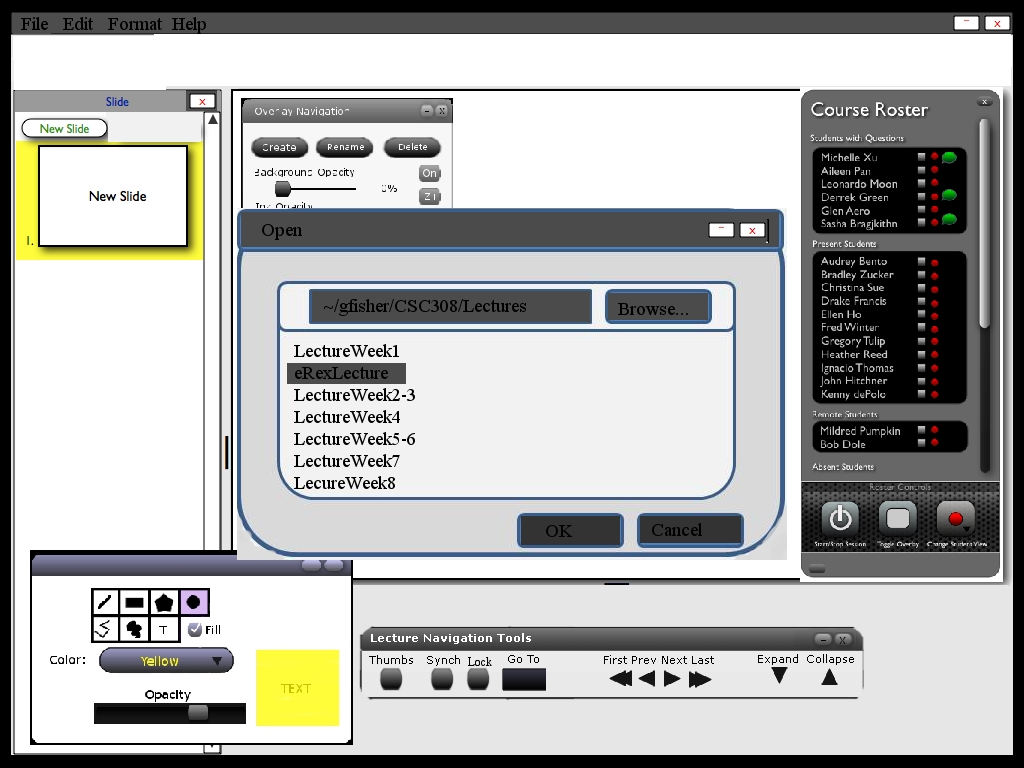
Figure 2.8.2-1: Opening a file.
The instructor then selects
the eRex lecture by double clicking it and the screen that is displayed is shown in Figure 2.8.2-2.
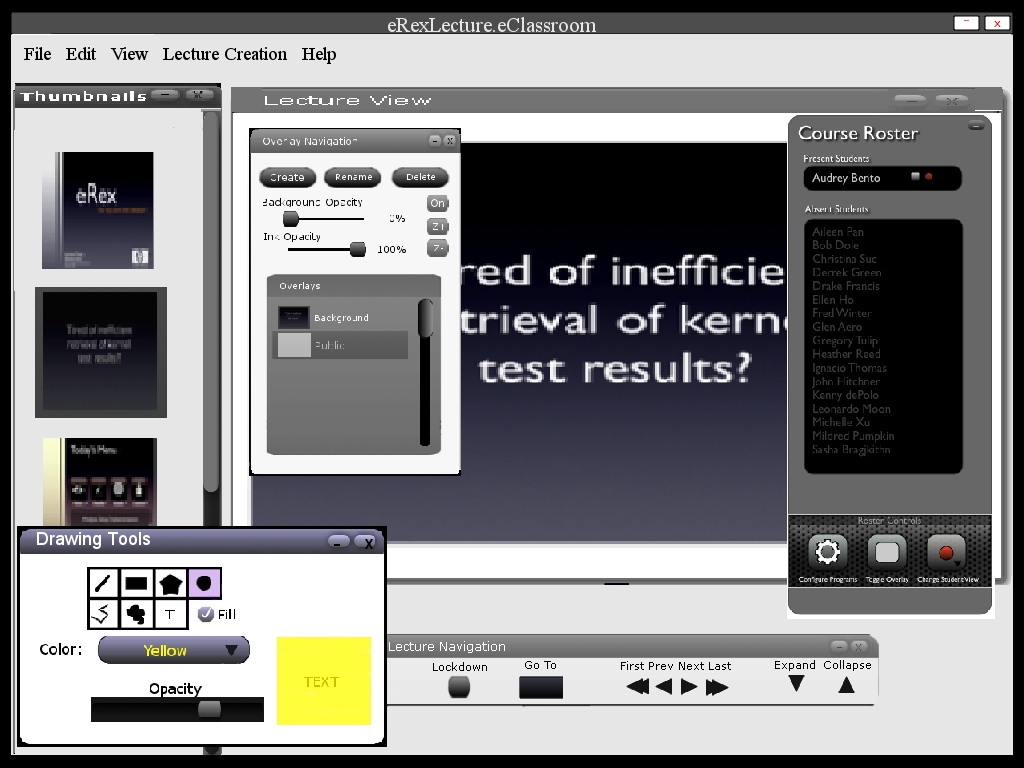
Figure 2.8.2-2: Instructor Sample Lecture.
A student view of the lecture is shown in Figure 2.8.2-3.
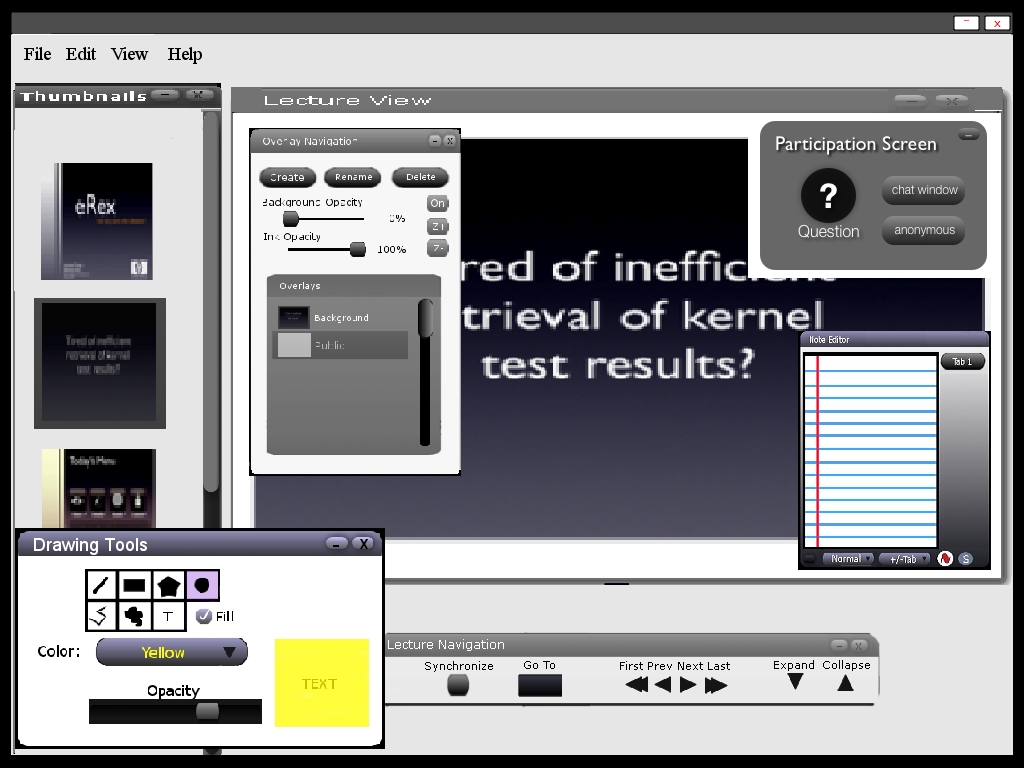
Figure 2.8.2-3: Student View of the Lecture.
There are two different scenarios to consider. The first one
is what happens if students log in before the instructor opens a lecture? and the other is what happens when students log in
after a lecture has started?
In the first scenario, where there are students logged in before the lecture has been made available, the student invokes the eClassroom tool, The screen
depicted in Figure 2.1-2 is displayed. After the instructor has made a lecture available any user
currently logged in gets a pop-up window asking them if they
want to join the lecture that was just made available, the window is shown in Figure 2.8.2-5.
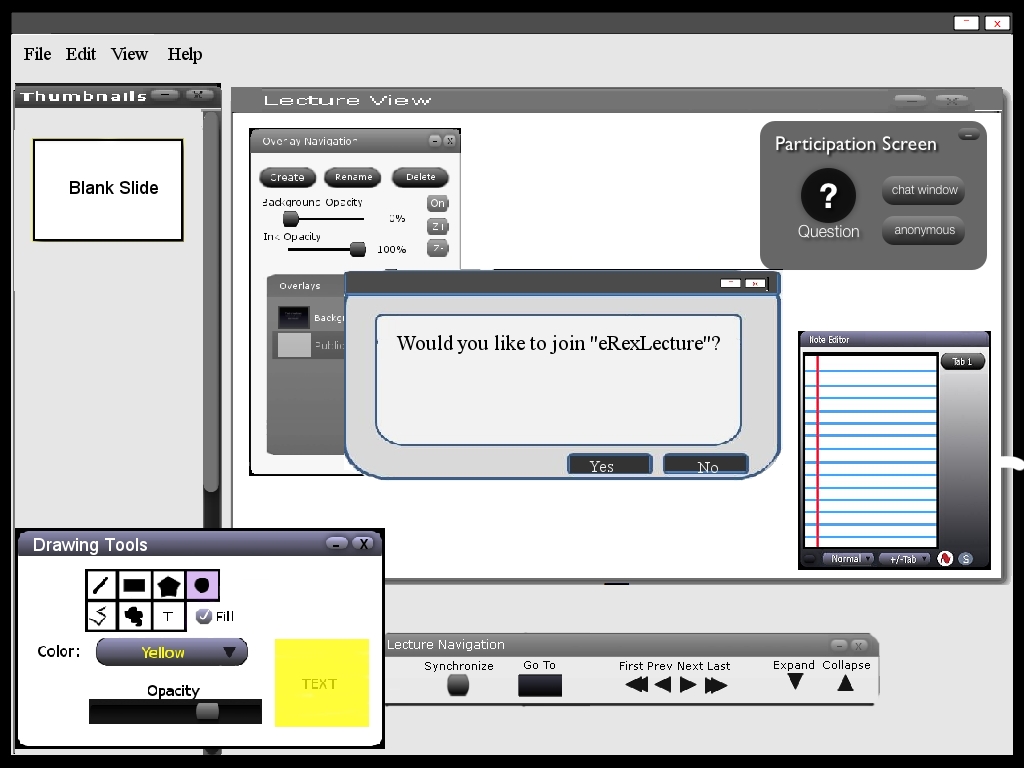
Figure 2.8.2-5: Student Prompt Window to Join current Lecture.
If the user has not yet invoked the eClassroom tool, it will be automatically launched in
the student machine and the lecture automatically starts.
In the second scenario where students
log in after a lecture has been available, as soon as they log in, eClassroom is launched and the
current lecture being presented is started at the current slide the instructor's machine is at.
Students can view any slide of the lecture at any time except if the administrative has locked down the
machines, this is explained in more detail in sections 2.3 Giving and Viewing a Lecture and 2.7 Navigating and using the Roster.
As mention before, eClassroom supports remote users. An out-of-class student must know the administrative computer IP address
to access any lecture.
To join the lecture the out-of-class student selects the View menu shown in Figure 2.1-5. and selects My Schedule. A window with a list
of all the classes the student is enrolled with is displayed, shown below in Figure 2.8.2-6.
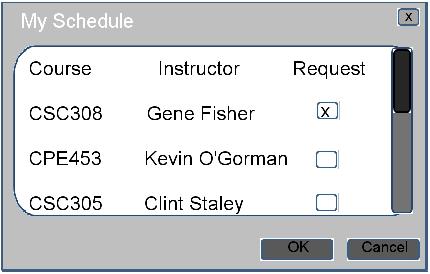
Figure 2.8.2-6: Student Schedule.
The student selects CSC308, which brings up the request window shown in Figure 2.8.2-7.
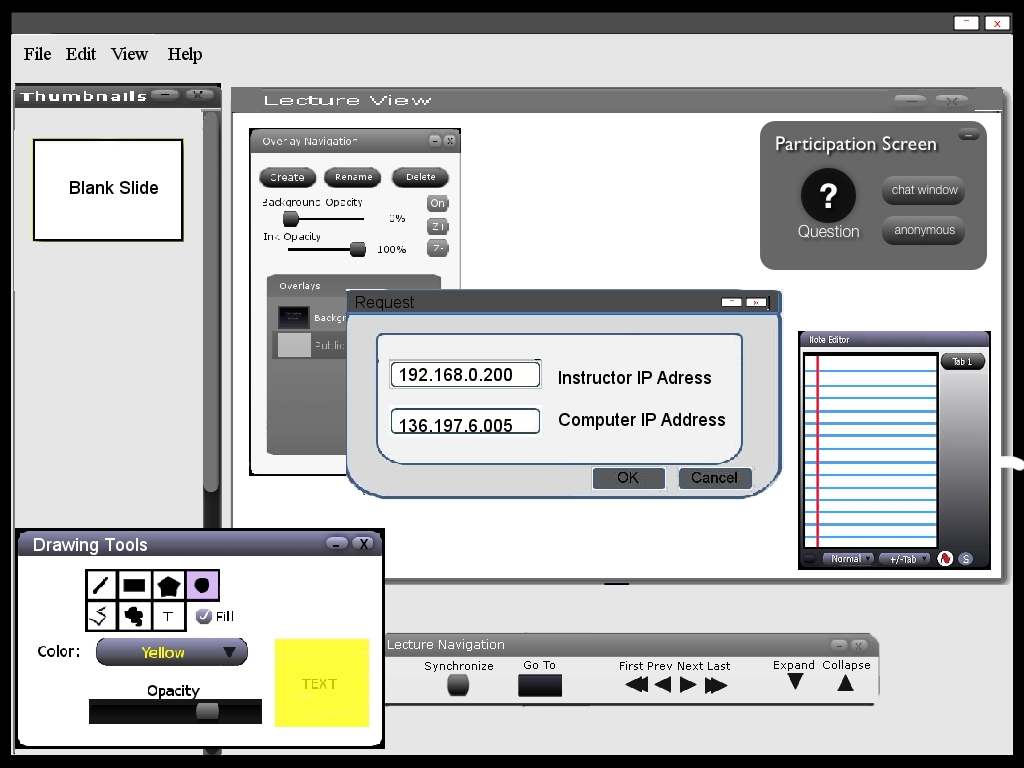
Figure 2.8.2-7: Request window.
The student fills out the designated machine's IP address as well as the students computer IP address.
The instructor will receive a message on the roster. Shown in Figure 2.8.2-8.
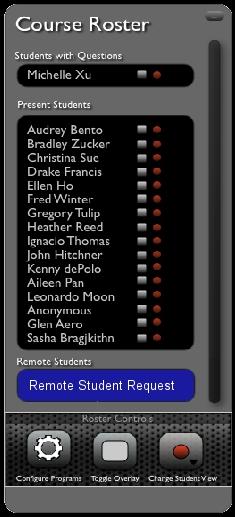
Figure 2.8.2-8: Request Message.
The instructor clicks on the message to view it, this brings up a list of all the out-of-class students who
are requesting permission to access the lecture. Shown below in Figure 2.8.2-9
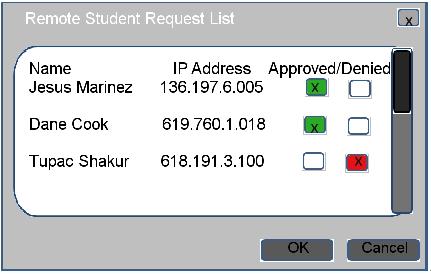
Figure 2.8.2-9: Request List.
In this case the Instructor allows Jesus and Dane access to the lecture, but denies Tupac. The Instructor adds them to the the configuration
list. This step adds them to the Roster as shown in Figure 2.8.2-10 and they become part of the class.
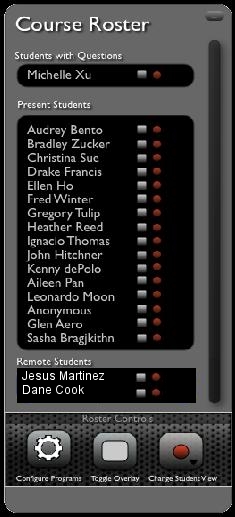
Figure 2.8.2-7: Remote Students Added to Roster.
Everytime there is a new remote student request, the section of remote users lights up and it looks similar to Figure 2.8.2-8. The only difference might be size
because of the number of out-of-class students.
Prev: Classroom Configuration
| Next: [None]
| Up: Functional Requirements
| Top: index


