Figure 1: Log-in Dialog
The primary function of the Scheduler tool is to generate and edit a schedule of classes. This tool also is useful in gathering information from faculty and students. There are three different views when users open up the software. One is for an administrator, the person who generates and edits schedules. The second is for faculty, professors who enter and edit their preferences. Finally, there is a student screen where students are able to provide information about classes and view faculty or university schedules. All of these screens are fairly similar but serve very different purposes. The different perspectives will be explored in more detail below:
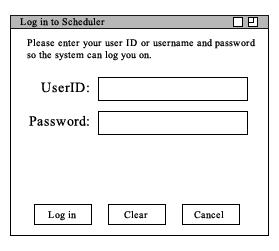
In order to log into the system, a user must have a login name and password (or ID). When first accessing the system, the user is presented with a basic login screen, as shown in Figure 1. The user enters a username and password (or ID number), and clicks 'submit'. This prevents users who are not authorized from accessing the system, and starts the system in the appropriate user mode. The login dialog is pictured below in Figure 1.

Figure 1: Log-in Dialog
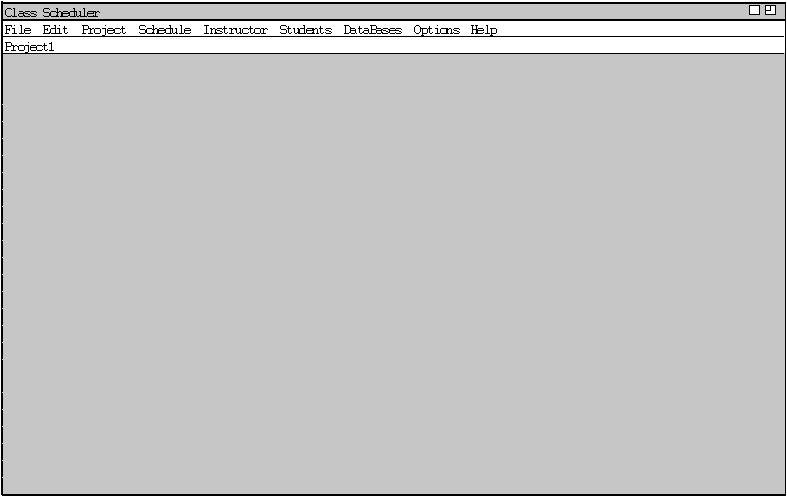
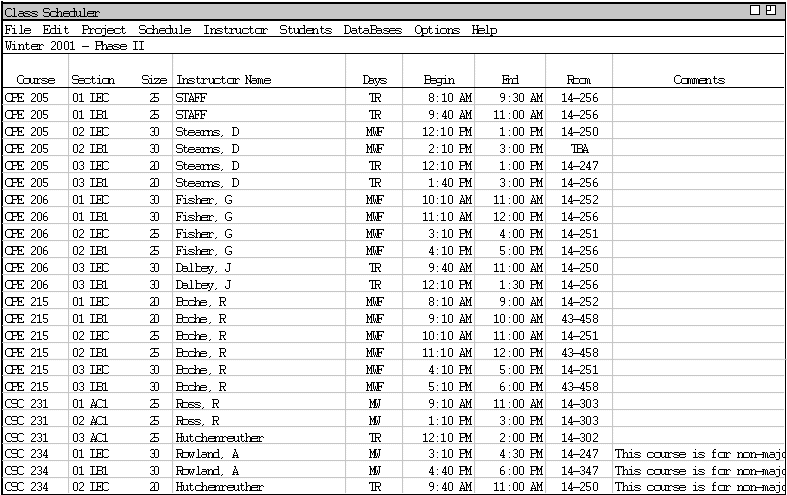
When any user logs in, their initial screen will consist of one of two kinds of schedules. If this is the first time an Administrator has logged in, or if the user is a Student or Instructor and no schedule has been posted yet for the current quarter, it will be a blank schedule full of empty sections. However, if an Administrator logs in and has previously saved a schedule, the last-saved schedule is opened in view mode. Similarly, if a schedule has been previously posted, then the default screen for Students and Instructors will be the most recently posted schedule and its associated sections. An empty schedule is pictured in Figure 2, and a sample full schedule is pictured in Figure 3.

Figure 2: A Blank Schedule

Figure 3: A Sample Complete Schedule (View Mode)