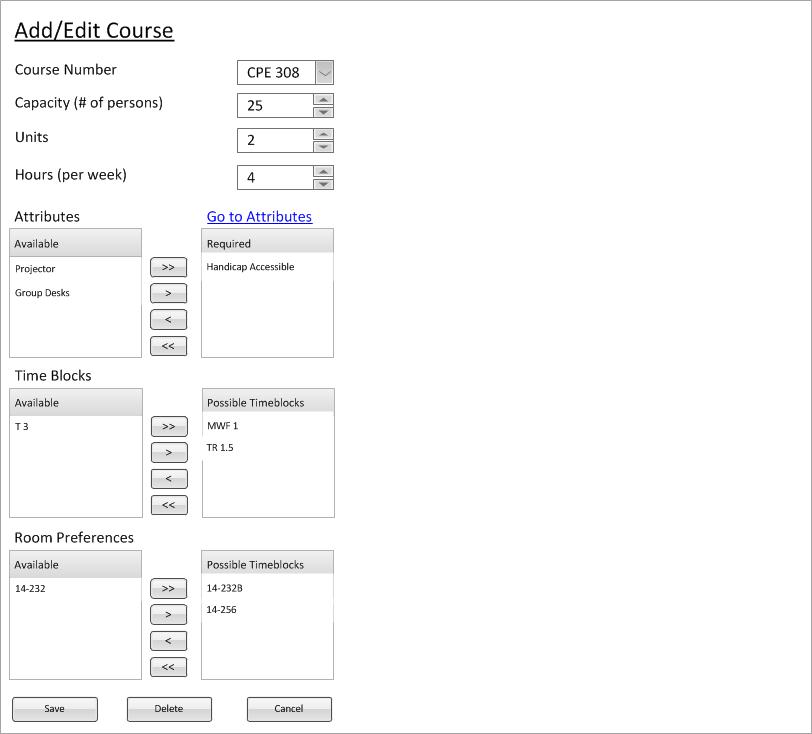
Figure 1: Course management example for a CPE 308 course.
When the user selects an existing course from the nav bar, the context window is replaced with the current content of that course, as demonstrated in figure 2. The building and course number are both filled in with the appropriate values, in this example Building 14 and Course 301, the capacity set to 30, and the attributes present for the course are displayed in the available scroll box. Additionally, the map is initialized to the building and then places a red dot on the current coordinates of the course inside the building (This example has the dot misplaced where 301 actually is). This entire page corresponds directly to what is in the course database for this unique course. All changes made on this page are confirmed or cancelled with the appropriate buttons at the bottom of the page.
The user may decide to change a building number for a current course and that is done by using the drop down menu. The user clicks the chevron and a drop down appears (shown in figure 3) The user then selects the building that they want to change this course into.
Figure 2 shows what the drop down menu (Bldg) looks like.
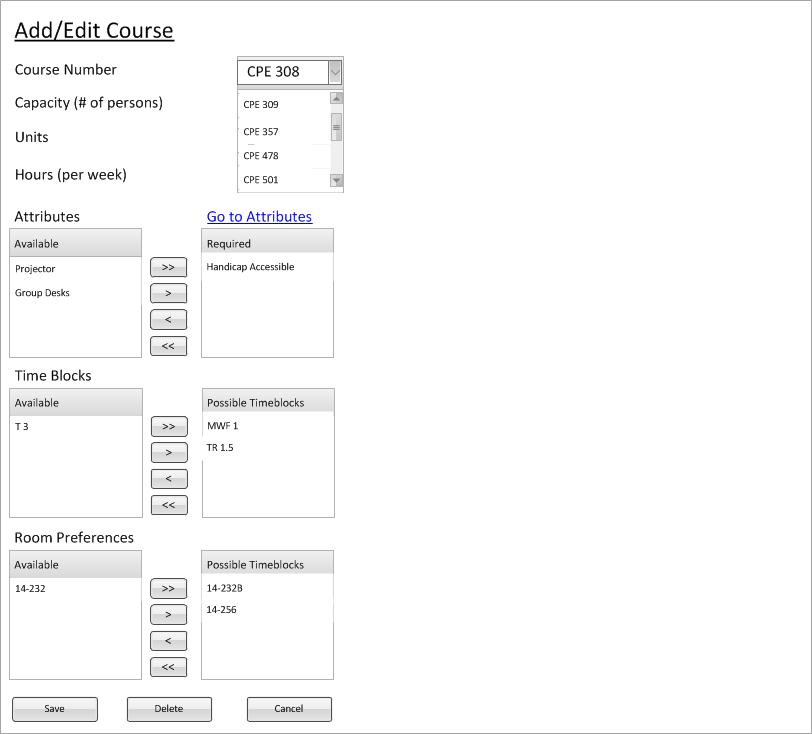
Figure 2: Drop down menu for courses with CPE 308 selected.
The user can choose to change the course number associated with this course by clicking or tabbing to the text field associated with course and typing in the new course number. Alpha numeric data is allowed however the beginning of the string must be letters.
User can do this by clicking the spinner to the appropriate value or by typing the number out. If the user types non-numeric values, the spinner will display the previously correct value.
User can do this by clicking the spinner to the appropriate value or by typing the number out. If the user types non-numeric values, the spinner will display the previously correct value.
User can do this by clicking the spinner to the appropriate value or by typing the number out. If the user types non-numeric values, the spinner will display the previously correct value.
For information on changing the attributes, time blocks, and room preferences, please refer to 2.3.1.3 on editing room attributes. It works in the same way.
If the user presses Save, a dialog pops up asking the user if they are ready to commit the changes
(if any have been made). The current state of the course (all the fields) is first be validated and then the database is
be updated accordingly.
If the user presses Cancel, a dialog pops up asking the user if they are ready to throw away the changes
(if any have been made). The window closes and returns to the workspace from which course management was called.
To read about the delete button functionality the use the "Next" link at the bottom of the page.