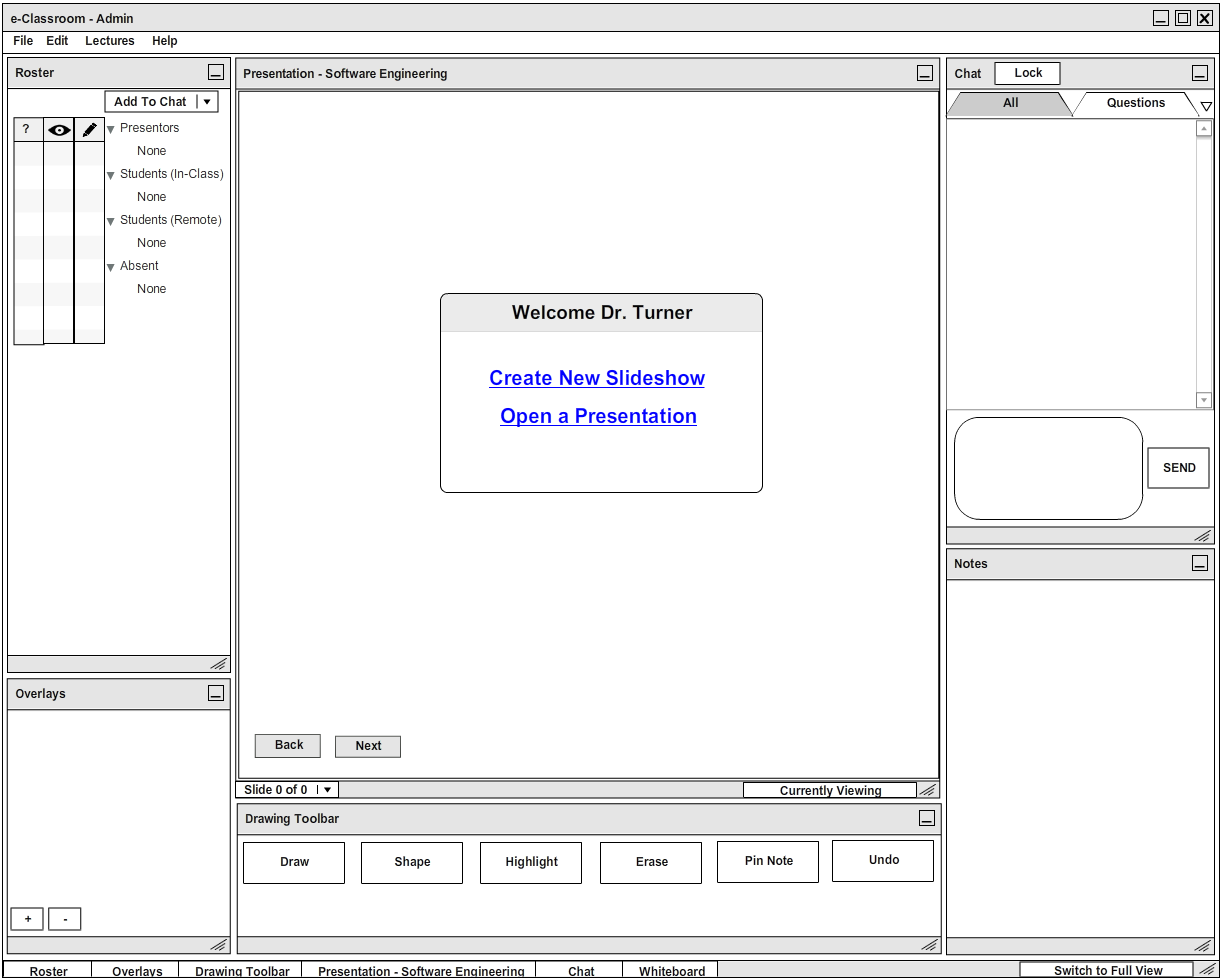
Figure 2: Presenter's main screen
After an instructor opens an E-Classroom session and logs in, the program displays the main screen as shown in Figure 2.
Figure 2: Presenter's main screen
The presenter's display consists of multiple elements each which the user can maneuver and position where they like. All panes can be minimized to the buttons along the bottom, or unminimized from those buttons. The buttons on the bottom right of each pane are for the presenter to choose which pane is displayed on the projector. The pane in the upper left is the roster. This allows the instructor to manipulate privileges which is discussed in more detail in section 2.3. In the center of the screen is the main presentation window. This is where slides will be displayed after opening or creating a new slideshow and is the primary focus of section 2.4. The chat pane on the upper right is for text communication between the teacher and students. Chat is covered in more detail in section 2.5.3. The bottom left pane is for dealing with overlays, which are layers that can be placed over the lecture slides and drawn on for adding notes during the lecture. This pane is covered in detail in section 2.5.2. The pane in the bottom center is the drawing toolbar pane. This pane is covered in more detail in section 2.5.1. Finally, the teacher can take notes in the pane in the bottom right.
After a student opens an E-Classroom session and logs in, the program displays the main screen as shown in Figure 3.

Figure 3: Student's main screen
The student display is quite similar to the instructor's display with a few less features. The display consists of multiple elements each which the user can maneuver and position where they like. The pane in the upper left is the roster. This allows the student to see which privileges each student has to interact with the professor. More detail on this in section 2.3. In the center of the screen is the main presentation window. This is where slides will be displayed and is the primary focus of section 2.4. The chat screen on the upper right is for text communication between the teacher and students. Chat is covered in more detail in section 2.5.3. The bottom left pane is for dealing with overlays, which are layers that can be placed over the lecture slides and drawn on for adding notes during the lecture. This pane is covered in detail in section 2.5.2. The pane in the bottom center is the drawing toolbar pane. This pane is covered in more detail in section 2.5.1. Finally, students can take notes while they are watching the lecture in the pane in the bottom right.