Figure 2.5.2.1 Window displaying the specifics of an entry
Even though the schedule has already been generated, it is not set in stone. Entries can be moved around, or modified in other ways to fit the user's wants. In order to view an item in more detail, the user will double-click on it and a new window will appear containing all the information for that entry. In list view, an entry is considered as a row of data. In work week and day views, an entry is considered as a block between two hour marks.
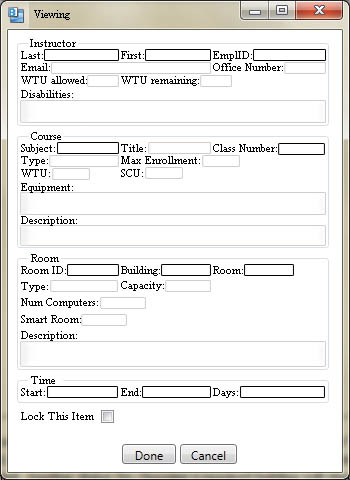
After having clicked on an entry in list view, or an entry with only one scheduled item in day or work week views, the following window will be produced.
Figure 2.5.2.1 Window displaying the specifics of an entry
The View window is segmented into four sections.
Instructor:
On the other hand, if the user is in the day or work week view and there are multiple scheduled items for the same entry, double-clicking on that entry will produce a new window with the expanded list of all the scheduled items for that entry. From there, the user can click on a specific entry within that window, and the window will now contain the specific information for the scheduled item as shown in figure 6.
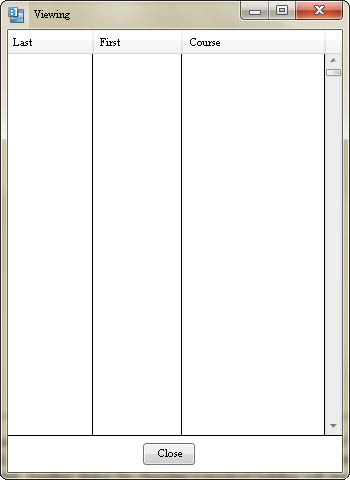
Figure 2.5.2.2 Window displaying the list of all scheduled items in the entry
In order to further describe editing a scheduled item, the following scenario will show a before and after snapshot of the schedule and item when the scheduled item is switched from Staff as an instructor to an actual instructor in the database. Note that the Instructors, Rooms, and Courses used for this example are taken from the database management section.
Before any changes are made to the schedule, here is a snapshot of what it currently looks like, with one course still containing "Staff" as its instructor.
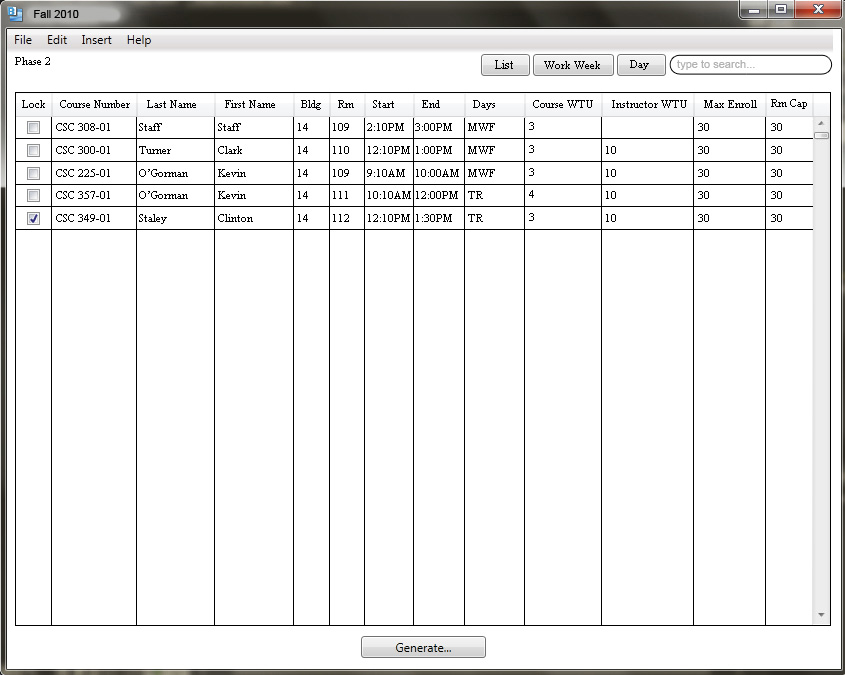
Figure 2.5.2.3 The Schedule before editing
When looking at all of the specific information as shown in figure 6, the user has the ability to edit the information. This is done by simple changing the values in the editable text boxes. The following window will be brought up when the user double clicks on the entry in the schedule.
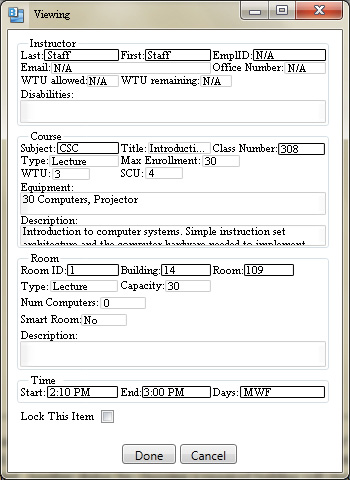
Figure 2.5.2.4 Window to edit a scheduled item
Notice that not all the information is editable. Only those that are in text boxes can be changed. To change the instructor from Staff to an actual instructor, the text boxes we will change are Last, First, and EMPLID. Once those text boxes have been filled, the other ineditable textboxes will automatically fill with the information of the instructor with the matching name and EmplID.
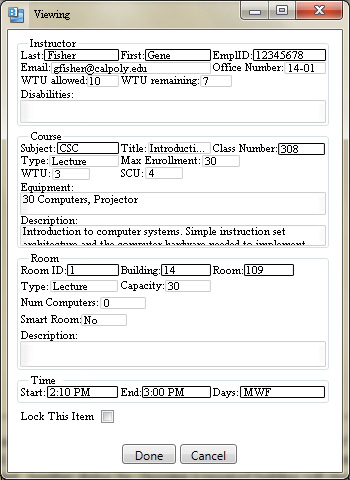
Figure 2.5.2.5 The Edited entry
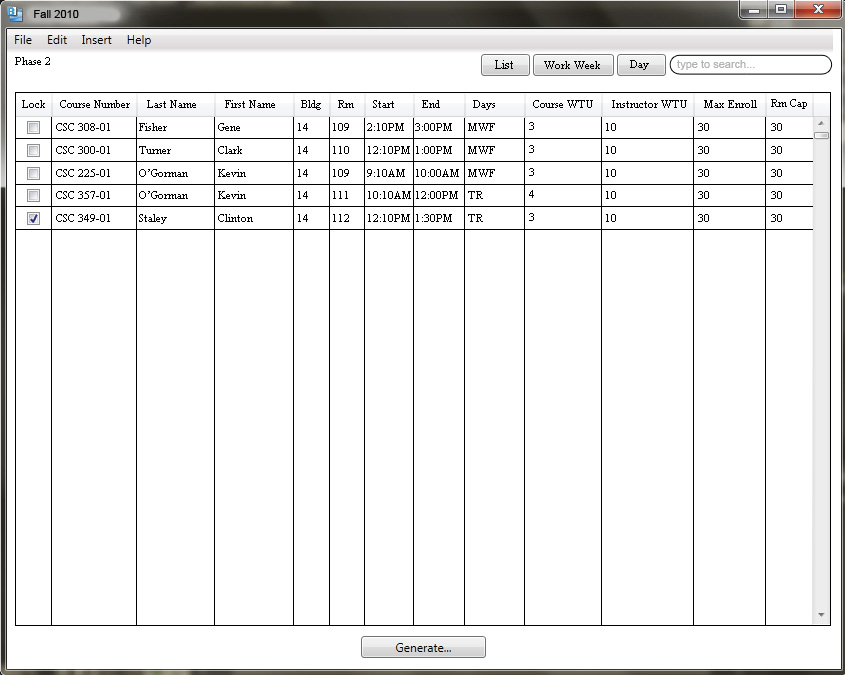
Figure 2.5.2.6 The resulting schedule
In the work week and day views, the user has the liberty to drag and drop entries to change their start and end times. In work week view, they can be dragged between days and different hours, while in day view they can only be dragged between different hours. If the user clicks and drags only the top or bottom edge of the event, either the start or end time (respectively) will be changed.