2.1.2. Student Interface
A student
uses the student
interface to take tests and
view his graded tests. He can log on the interface using his Calpoly ID
and password. If he is taking an
in class test, the test appears automatically after logging on. If he is
taking a take home or practice test, he must manually open the test
after logging on. The student answers
each question on a test and then submits it
for grading. After submitting a test, he can retrieve a graded copy of
his test when his instructor passes it back using the Instructor
Interface. Refer to Test Menu in section 2.1.1 Teacher Interface to
find out how an instructor passes back a graded test. The graded copy
shows the test including all questions as graded and instructor
comments. Refer to section 2.5.2.3
Grading Each Question Type for more details on graded questions.
Refer to section 2.5.2.1
Comments and Feedback for more information on instructor
feedback. The primary use of the student interface involves taking an in class test
which is outlined later in this section.
2.1.2.1 File Menu
Clicking on the File menu
displays five menu items labeled Open,Save, Save As, Close, and Exit as shown in Figure 2.1.2.i1.
Clicking on the Open menu item will bring up a file open dialog
interface as
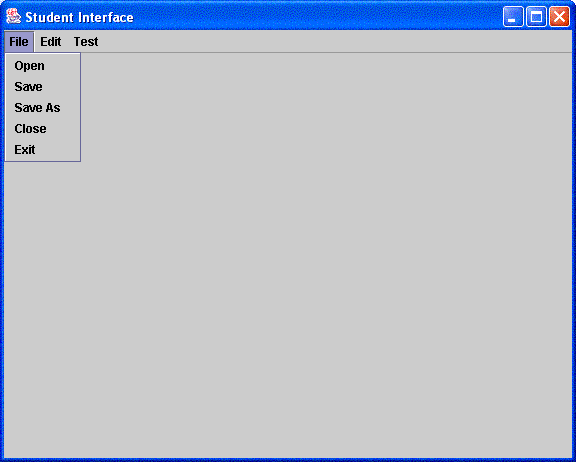
Figure 2.1.2.i1: File Menu
shown in Figure
2.1.2.i2. The student opens a test file into the student interface by
either clicking on the test file once and then clicking the Open button or double clicking on
the test file. If a test file cannot be
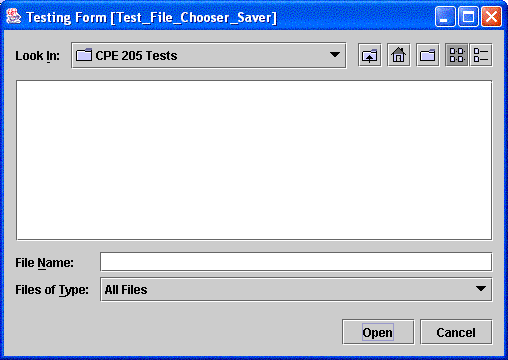
Figure 2.1.2.i2: File Open Dialog Interface
opened, a prompt shown in
Figure 2.1.2.i3 appears informing the student that the test could not be
opened. For a visual of what
a test looks like in
the Test Tool program, refer to section 2.4.2 Taking a Test.
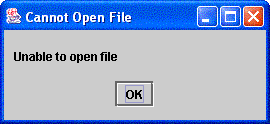
Figure 2.1.2.i3: File Open Error Prompt
Clicking on the Save menu item saves the changes,
if any, to the currently displayed test in the student interface.
Clicking on the Save As menu item brings up a file save dialog interface
as shown in Figure 2.1.2.i4. Clicking the Save As button will save the

Figure 2.1.2.i4: File Save Dialog
Interface
the currently displayed test as a new file with a unique name or as
a replacement for an existing file with the same name as the existing
file. The student is prompted as shown in Figure 2.1.2.i5 if saving the
test will overwrite an existing test. The prompt gives the student the
choice to proceed or cancel saving the test. Clicking on the Close menu

Figure 2.1.2.i5: Overwrite Existing
File Prompt
closes the currently displayed test and allows the student interface
to remain active. If there are any unsaved changes to the test when the
student clicks the Close menu
item, a prompt appears asking the student if he wants to save the
changes made to the test before closing as shown in Figure 2.1.2.i6.
Clicking the Exit menu item will
close the student interface and exit the Test Tool program. If there are
any
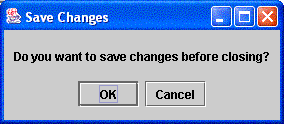
Figure 2.1.2.i6: Save Changes Prompt
unsaved changes to the currently displayed test remaining when the
student clicks on the Exit menu item, a
prompt will appear asking him if he wants to save the changes made to
the test before exiting the student interface as shown in Figure
2.1.2.i7.
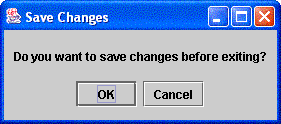
Figure 2.1.2.i7: Save Changes Prompt
2.1.2.2 Edit
Menu
Clicking on the Edit menu,
four menu items appear: Undo, Cut, Copy, and Paste as shown in Figure 2.1.2.i8.
When a student clicks on the Undo menu
item, the test in the student interface is restored
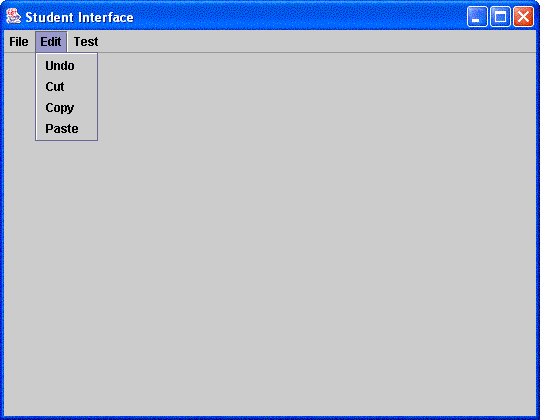
Figure 2.1.2.i8: Edit Menu
to the state before the most recent change.Using the cut menu option on a section of
highlighted text will remove that text from its position and store it
in the clipboard.A clipboard
is a temporary storage location for all text that is being copied, cut
and pasted. To restore what was cut out, clicking the Paste menu item will
put the text currently in the clipboard back on the test in the location
where the cursor is positioned.
The Copy option works the
same way as cut, except that the highlighted text is not removed from
its position.
2.1.2.3 Test
Menu
In-Class Tests
When an instructor
begins an in class test within the Test Administration Interface, an
interface shown in Figure 2.1.2.i9 is displayed on the students screen. Refer to section
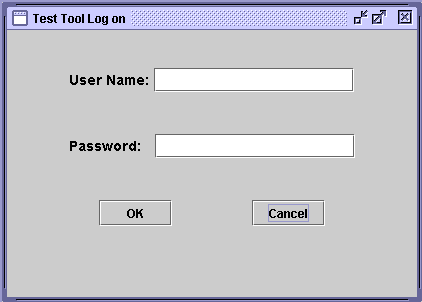
Figure 2.1.2.i9: Log On Interface
2.4.1 Administering A Test
to learn more about the Test Administration Interface. There are two text
fields presented within the interface: User
Name and Password. A student first
types in his login ID into the User Name text box, and
types in his password into the Password text box. He clicks on the OK
button and if the entered ID
does not match a registered ID or if the entered password does not match
the password corresponding to the ID, a prompt shown in Figure 2.1.2.i10
appears stating the input is incorrect. If a student decides to stop logging on,
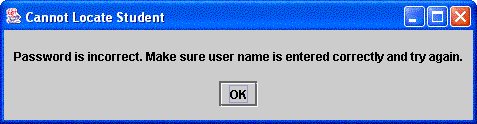
Figure 2.1.2.i10: Log On Error Prompt
he clicks on the button labeled Cancel to exit the program. If his ID and password are
verified, the Test
Tool Log on interface will
disappear and the actual in class test appears on the monitor screen
used by the student's computer terminal. Refer to section 2.4.2 for more information on
completing an in class test. When a student has
completed an in class test and clicks the submit button, the in class
test disappears and the student interface appears. The student can
continue using the interface or exit the Test Tool program.
Out-of-Class Tests
If a student needs
to take a test that is not in class, then he must follow a different set
of steps to taking the test. First, he must retrieve the
test either from blackboard or from the instructor's website by downloading
the test to a computer terminal or any computer that can be used to run
the Test Tool program off site. The student activates
the Test Tool program and the Test
Tool Log on interface appears on
the monitor screen. He logs on the same way he would log on for an in
class test and a new interface as
shown in Figure 2.1.2.i11 titled Student
Interface appears after the program verifies
his ID and
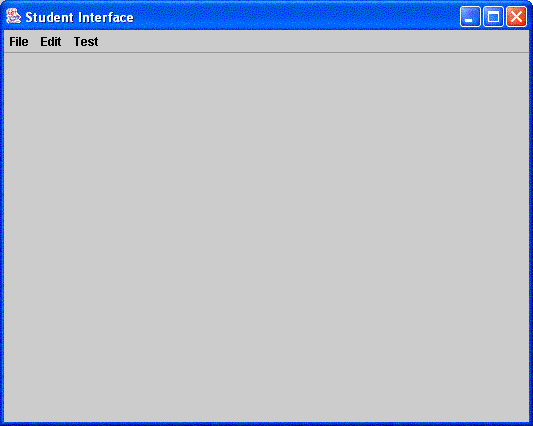
Figure 2.1.2.i11: Student Interface
password. Initially, the
student
interface will appear as an empty
interface with
three menus: File,
Edit, and Test. An empty
interface is a state where no tests are displayed in the student
interface. The student clicks on the Test
menu and two menu items appear: Take
Test and Check Grade as
shown in Figure 2.1.2.i12. He clicks on the Take
Test menu
item and two more sub menu items are presented: Take
Home and Practice as shown in
Figure 2.1.2.i12. If the student needs to take a take home test, he
clicks the Take Home sub menu
item and the file open dialog interface as shown in
Figure
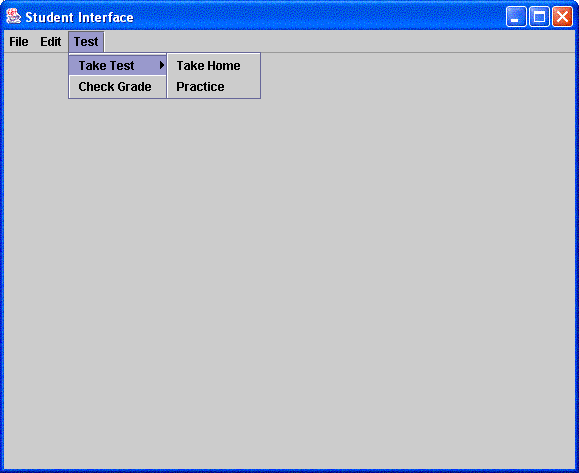
Figure 2.1.2.i12: Take Test Menu
2.1.2.i2 will appear on the monitor screen in front of the student
interface. The student browses to the location where the test file is
stored and opens it in the
student interface. If the take home test cannot be opened, the prompt
shown in Figure 2.1.2.i3 appears informing the student that the test
could not be opened. Once the test is opened, the student modifies the
test with his answers as demonstrated in 2.4.2.
The student can use the Undo, Cut,Copy, and
Paste
menu items of the Edit menu as shown
in Figure 2.1.2.i8 to modify his test. When the student is done
modifying his test, he submits his test for grading by clicking on the
submit button. The student
interface becomes an empty interface, and the student can continue using
the interface or exit the program.
If a student wants to take a practice test, he retrieves the test
from blackboard or his instructor's website by downloading the test to a
computer terminal or any computer that
can be used to run the Test Tool program off site.
He clicks the Test menu,
clicks the Take Test menu item,
and clicks Practice sub menu
item which brings up the same file open dialog interface as shown in
Figure 2.1.2.i2. The student opens the practice test into the student
interface. If the practice test cannot be opened, the prompt shown in
Figure 2.1.2.i3 appears informing the student that the practice test
could not be opened. The student modifies the test file with his
answers, and submits the practice test by clicking on the check grade
button. The check grade button appears in place of the submit button if
the practice test can be automatically graded by the Test Tool. Refer
to section 2.5.1 Automatic
Grading to find out how a test can be automatically graded by
the Test Tool.
Students should know that only one test can be displayed in the
student interface at a time. If a student is taking an in class test, no
other in class, take home, or practice tests may be opened until the
currently displayed in class test is submitted. Similarly if he is
taking a take home test, no other tests may be opened until the
currently displayed take home test is closed.This is to prevent a
student from opening another test and copying the answers.
Graded Tests
If a student wants to view a graded test, he clicks the Test menu and clicks on the Check Grade menu item as shown in
Figure 2.1.2.i13. Clicking the Check Grade menu item brings up a dialog box
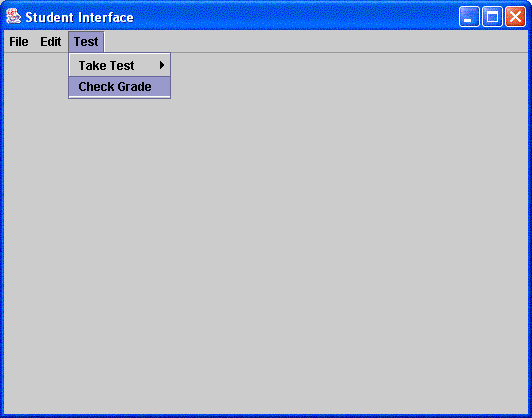
Figure 2.1.2.i13: Check Grade Menu
inside the student interface
with the title Graded Test Location as
shown in Figure 2.1.2.i14. A dialog box is an interface inside of the
student interface. The student types in a unique network identifier that
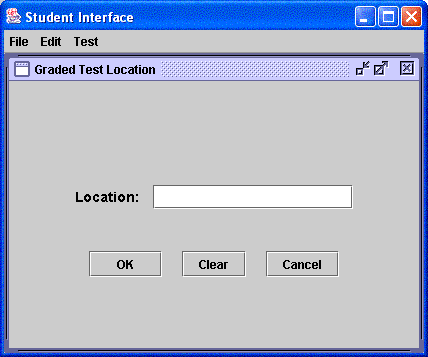
Figure 2.1.2.i14: Graded Test
Location Dialog Box
represents the location for his graded test. A unique network
identifier could be an IP address or even a machine name.Clicking the Clear button will erase the
current address typed in the Location
text field, and clicking the Cancel button
will close the Graded Test Location
interface and return the student to the student interface.Clicking OK will establish a connection to
the specified loaction and retrieve the graded test If the graded test
cannot be opened or the location cannot be found, the prompt shown in
Figure 2.1.2.i3 will appear informing the student that the graded test
could not be opened.Refer to section 2.5.2.3 for details on
graded questions and section 2.5.2.1 for
information on instructor feedback. The student can
save a copy of his graded test using the Save As menu item under the File menu.