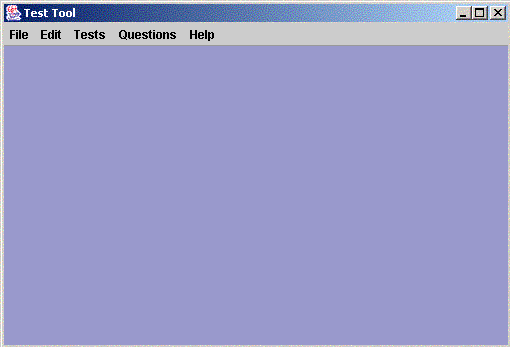
Figure 2.1.1.i1 Initial Instructor Interface
The instructor works with the Instructor Interface in the Test Tool system. Figure 2.1.1.i1 shows the Instructor Interface.
Figure 2.1.1.i1 is the initial screen that the instructor sees when he logs into the Test Tool system. This initial screen is a multiple document interface. In a multiple document interface, multiple documents may appear within one main screen. The main screen in this scenario is the Instructor Interface. All screens will appear within this window. Among some of the screens the instructor will see within this multiple document interface are 2.2.1 Test Generation Wizard, 2.3.1 Local Question Banks, 2.3.2 Shared Question Banks, and 2.5.2 Test Grading Screens. At the top is a menu bar containing 5 menu labels. They are as follows: File, Edit, Tests, Questions, and Help. Clicking on any of the menu labels will result in that menu option to expand.
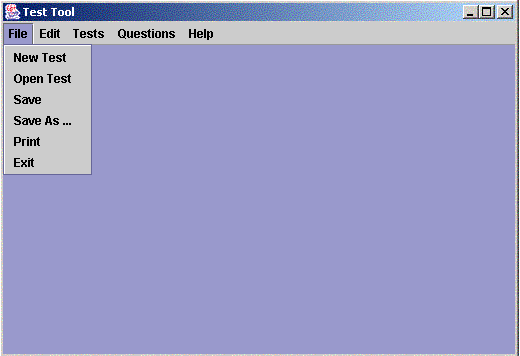
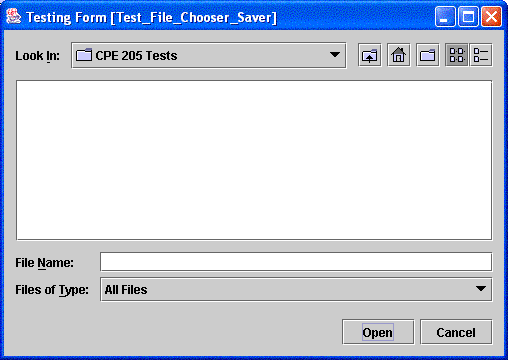
Figure 2.1.1.i2 shows the File menu. Clicking on File will expand the menu and show its contents,namely: New Test, Open Test, Save, Save As, Print, and Exit. Clicking on New Test will activate the Test Generation Wizard. Please refer to section 2.2.1 Auto Generation for more on Test Generation. Clicking on Open Test will open up an open file dialog like the one shown in Figure 2.1.1.i3.
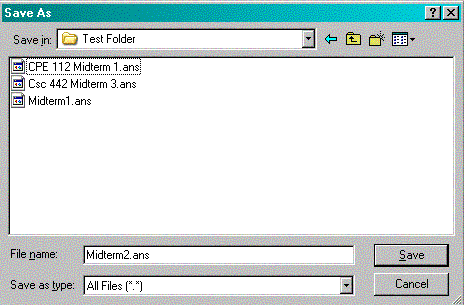
To open an existing test, the instructor uses the Open Test option and this will open the test in an editing window. Please refer to section 2.2.3 Edit Test for more information on test editing. Clicking on Save will save test files and question banks that are in the active window. The active window is the window the instructor is currently working on. Clicking on Save As will save the test files and question banks in the active window to the drive the instructor specifies like in Figure 2.1.1.i4.
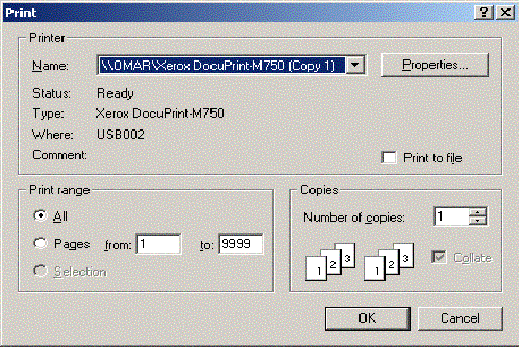
Clicking on Print will print the active window. Figure 2.1.1.i5 shows the screen shot for printing an active window.
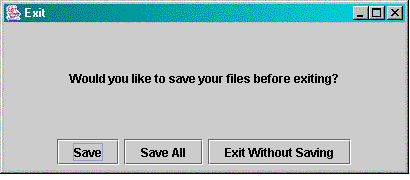
Clicking on the last menu item Exit will cause the instructor to exit from the Test Tool system. Before the program is exited, figure 2.1.1.i6 will pop up asking the instructor if he wishes to Save his files, Save All his files, or Exit Without Saving.
If the instructor clicks on Save, a save window will appear for every file that is within the Instructor Interface. Refer to figure 2.1.1.i4 for the save window. Clicking on Save All will save all files within the Instructor Interface. Clicking on Exit Without Saving will terminate the Test Tool system without saving.
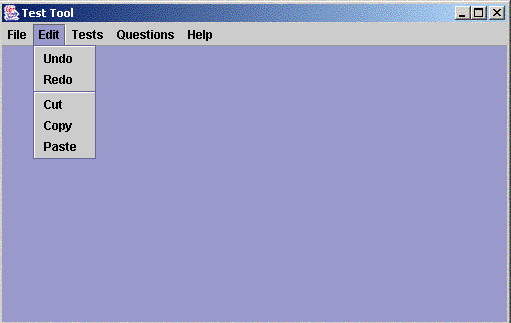
Figure 2.1.2.i7 shows all items from the Edit menu which includes the
following: Undo, Redo, Cut, Copy, and
Paste. The Cut, Copy, andPaste menu items are used when the
instructor is editing an exam 2.2.3
Edit Test. He can "cut out" a highlighted text area with the Cut option, and "paste" the cut
portion of text at the location the cursor is currently situated with
the Paste option. He can also
"copy" a highlighted text area with the Copy. Using Copy will not remove
the existing text but simply take a copy of the highlighted string and
store it in a clipboard. A
clipboard is a temporary storage location for all text that is being
copied, cut and pasted. Undo and Redo options allow the instructor to
"undo" any test editing that was previously made and also to "redo" any
test editing that was previously undone. The instructor may only "undo"
one time after editing and "redo" one time after something is undone.
The instructor is allowed to use the Undo
and Redo option again only if
more editing has been done to the test file. For more info on this
section, refer to section 2.2.3.
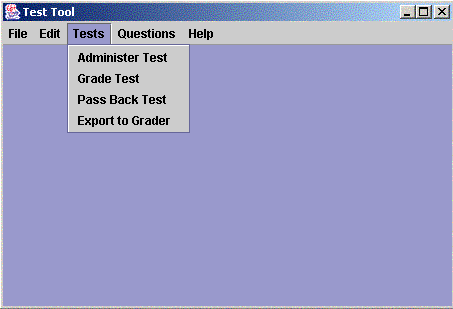
Figure 2.1.1.i8 shows the menu items within the Test menu. Administer Test allows the instructor to proctor an in-class test. Refer to section 2.4.1 Administering A Test for information pertaining to administering a test. Clicking on Grade Test will open up the grading section. Refer to section 2.5.2 Manual Grading for information pertaining to grading a test.
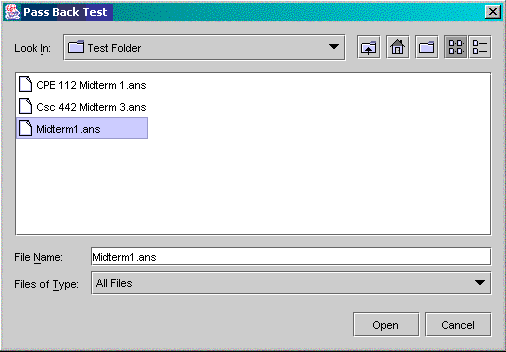
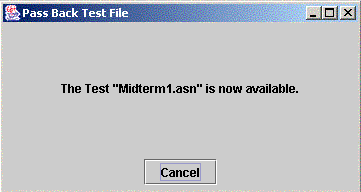
Clicking on the Pass Back Test option will open up an open dialog window. The instructor selects the test to be passed back to students so that they can see their graded test electronically. When the instructor selects the test file, it will open up the Test File Name window. The Test File Name window will display a message "The test "Midterm1" is now available." "Midterm1" is just a test file that the instructor wishes to pass back to students. Students can now connect to the instructor's machine or any location specified by the instructor to get their tests. When the instructor closes the Test File Name window, no new students will be able to retrieve their test. The reason the students won't have access to their tests after the instructor closes the Test File Name window is because the Test Tool system tries to simulate the classroom environment. Students must come in class, then the instructor passes back the test within a given time. After the instructor click cancel on the Test File Name window, no students can access their tests. Look at figure 2.1.1.i9 and figure 2.1.1.i10 for the Pass Back Test window and the Test File Name window.
After the instructor clicks on the open button or the instructor double click on the test file Figure 2.1.1.i10 will be shown.
Clicking on cancel in figure 2.1.1.i10 will terminate access to the test file for all students.
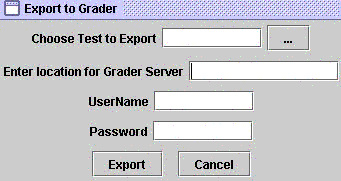
Clicking on the Export to Grader menu item will display the figure shown in 2.1.1.i11. The instructor chooses the test by clicking on the three elipses and browsing to the location where the graded test is stored. The instructor then enters the location of the grader server, a pre-determined location where the graded test files will be stored. This location is used by the grader tool to import student grades and other statistics into the grade sheet. After entering the location of the grader server, the instructor need to enter his username and password before exporting the graded test to the server. The reason for this is to prevent any unauthorized access to the server, which may compromise the system. Finally, the instructor can click on Export and a connection will be establised to the server upon authentication. In case a connection could not be established, an appropriate message will be displayed. For example, if the username or password was incorrect, then a screen similar to Figure 2.1.2.i2 will be displayed. If a time out is encountered then a time out screen will be displayed.
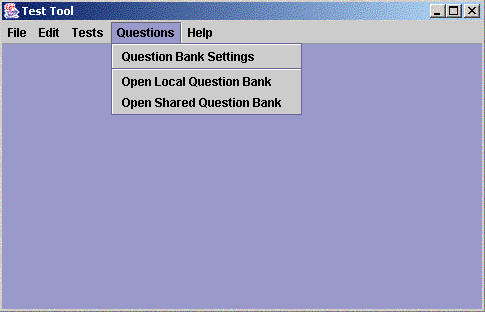
Figure 2.1.1.i8 lists the items for the Question menu. Clicking on Question Bank Settings will show the instructor setup options for either a local or shared question bank. Refer to section 2.3.1 and section 2.3.2 for information regarding setting up local and shared question banks. Clicking on the Open Local Question Bank option will open up a local question bank that the instructor had previously setup. Clicking on the Open Shared Question Bank option will connect the instructor to the shared question bank. For information on connecting to the local and shared question banks refer to section 2.3.1 and section 2.3.2.
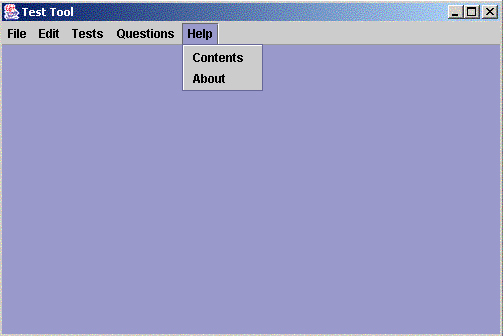
Figure 2.1.1.i13 contains the Help menu and its sub menu items: Contents, About. When the Contents menu item is clicked, it will show a help menu section that answer common questions the user may have and a tutorial on specific topics about the software. The About menu item has a pop up window telling the user the version of the software and the team's web site.
| Up: 2.1. User Interface Overview |
Next: 2.1.2. Student Interface |